
Top Techniques for Displaying Your iPhonescreen on macOS Devices
Top Techniques for Displaying Your iPhonescreen on macOS Devices
5KPlayer > AirPlay > Share iPhone Screen on Mac
Disclaimer: This post includes affiliate links
If you click on a link and make a purchase, I may receive a commission at no extra cost to you.
Best 3 Ways to Share iPhone Screen on a Mac Computer
Written by Kaylee Wood | Last update: June 23, 2020
For some purpose, you might need to share your iPhone screen to Mac, such as sharing iPhone live video to Mac and recording it, watching movies and running the APPs on the bigger screen, playing iOS games and seeing the screen on Mac, etc. You might be thinking screen sharing across iDevices is easy with the AirPlay 2. But the fact is that screen mirroring iPhone to Apple TV is easy, while syncing iPhone to Mac is the opposite. So, you may ask now: why cannot I share iPhone screen to Mac? Here are all the things you should know and the ultimate solutions to help.
Why Can’t I Share iPhone to Mac with AirPlay Directly?
AirPlay is a wireless streaming proprietary protocol stack developed by Apple Inc. 2012 and the later iPhone and Mac models are all built-in with AirPlay support. Sharing content from iPhone to Apple TV or from Mac to Apple TV is just a matter of course, but it does not naturally support implementing the intersection of iPhone and Mac.
In order to achieve AirPlay, sender (also referred to server) and receiver, both the elements have to be present. However, iPhone and Mac are designed to be the senders, Apple TV is the only device that can receive the streaming content, so you cannot use AirPlay across the two devices that both act as senders. To turn you Mac a receiver to display the iPhone screen, you need a 3rd party program.
AirDrop vs. AirPlay
AirDrop, serving both iOS and macOS, is an ad-hoc service developed by Apple Inc., allowing users to send and receive files, photos, etc., with nearby Apple devices wirelessly by using Bluetooth. It sends the file to the local drive of Mac and takes the storage space. After disconnected, the data will be saved and open on the Mac anytime as you want. To achieve AirDrop, Bluetooth and Wi-Fi are both needed, but it does not require connected the devices with the same network.
Different from AirDrop that sends data itself, AirPlay allows sharing iPhone iPad or Mac screen to display it on Apple TV, as well streaming video from the sender to the receiver, and it does not take storage space. After disconnected, you cannot find the file and open it again.
AirPlay requires Wi-Fi only, but the two devices must be connected to the same network. Compare with Bluetooth, Wi-Fi with a greater bandwidth has faster speed in transferring data, and you can easily share to watch high-res video in large file size.
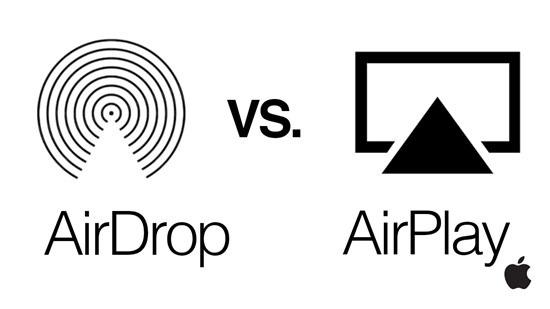

Conclusion: If you want to send files from iPhone and to be saved on Mac, choose AirDrop, but if you only want to view content in real-time and do not need to save files to take up storage space on your Mac, use AirPlay.
How to Share iPhone Screen on Mac?
Method 1: Share iPhone Files to Be Viewed on Mac by Using AirDrop
It is a little bit different from sharing iPhone screen on Mac, Airdrop from iPhone to Mac is sending local files on the iPhone and to be stored on Mac, so that it can be viewed offline. If you want to share video, music, photos on iPhone, AirDrop can help wireless sending the files without pushing them via email. But as mentioned above, this transmission method relies on Bluetooth to achieve. The distance between the two devices cannot be too far. And if you want to transfer multiple files or large files, it may take you a long time to wait for the Bluetooth bandwidth.
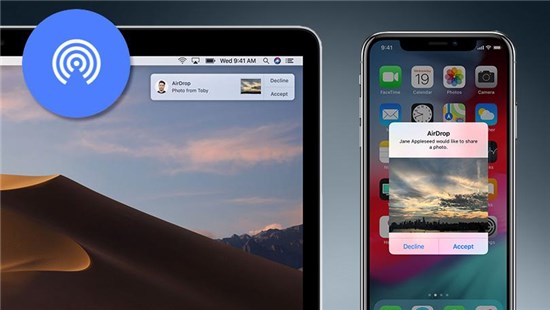
Step 1: Activate AirDrop on both iPhone and Mac. First, call out “Control Center” on your iPhone, tap Bluetooth icon and Wi-Fi icon to open them, and make sure Wi-Fi is connected then. Go to your Mac, click on the Bluetooth icon in the menu bar and also make sure have your Mac connected with the Wi-Fi network.
Step 2: Open the file that you want to share to Mac on iPhone, then tap the sharing icon on the lower-left corner, then your iPhone will automatically discover the nearby devices. After then, tap to select you Mac.
Step 3: On your Mac, it shows a message to notice that your iPhone is going to send the file to you, then click on “Accept”.
Note: If you cannot see Bluetooth icon in the menu bar on Mac, go to Mac “System Preferences” settings to find it.
Method 2: Share iPhone Screen on Mac by Using QuickTime
Sharing iPhone screen by QuickTime is not for data backup, it is actually the thing we called “streaming” that can sync iPhone to Mac. By using QuickTime, you can show you whole iPhone screen content one to one on Mac, including opening local files, playing online videos, and the process of operating the APPs.
Also, using QuickTime to share iPhone screen to Mac could be the fastest way to streaming data, because it uses the lightning cable for wired transmission, and it is more efficient and stable than wireless transmission.
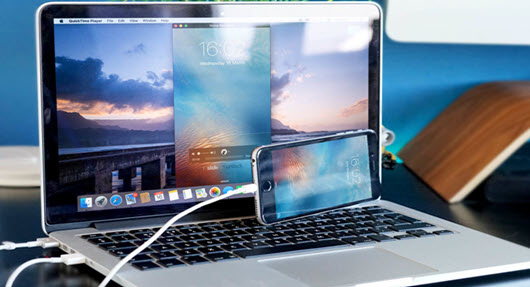
Step 1: Connecting your iPhone and Mac with a lightning cable.
Step 2: Open QuickTime on your Mac. Click on “Go” icon in menu bar and select “QuickTime”, or click on “Finder” icon in the menu bar, type in “QuickTime” and select it.
Step 3: On the user interface of QuickTime, click on the downward triangle icon next to the red round recording button.
Step 4: After your iPhone is recognized, select it, and then you can start screen sharing iPhone to Mac.
Note: QuickTime is the default media player that is pre-installed on Mac, but if you cannot find it anywhere on your system, please go to the Apple official download site to get it. If you perform screen recording while using wired transmission, remember to keep the cable connected, otherwise the screen recording will be terminated.
Method 3: Share iPhone Screen by Using 3rd Party Program – 5KPlayer
Although wired transmission has the advantages of fast and stable, it is not convenient. The existence of cable, to a great extent, has limited the distance between the two devices. Therefore, wireless sharing is a better choice for most people.
Using AirPlay to reflect iPhone on Mac, usually we called it “screen mirroring”. As mentioned above, sharing iPhone screen to Mac by using AirPlay needs the help with a 3rd party program to turn Mac an AirPlay receiver. Here we recommend 5KPlayer, the best free video tool with built-in AirPlay feature that helps you using screen mirroring on iPhone to share screen on Mac.
5KPlayer is an all-in-one multimedia tool that has incorporated Apple’s AirPlay wireless streaming tech. With 5KPlayer installed on Mac, it can act as a screen mirroring receiver, as well as recording iOS, iPadOS screen videos with sound on Mac end, so that you can make APP tutorials, show off gaming skills and make sound books as easy as possible.
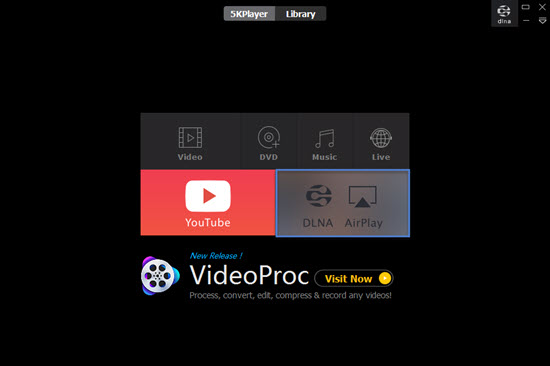
How to Share iPhone Screen on Mac with 5KPlayer?
Step 1. Download and install 5KPlayer, the launch it on your MacBook. Connect your iPhone and Mac with the same Wi-Fi network.
Step 2. On the user interface, click on “AirPlay DLNA” button, and scroll down to the very end to “AirPlay > AirPlay service”, and select to turn on it.
Step 3. On your iPhone, call out “Control Center”, and tap “Screen Mirroring” icon to turn on it, then the iPhone will automatically search for devices.
Step 4. Select your Mac, and then you can start screen mirroring iPhone to Mac.
Note: It is necessary to connect the devices to the same network and turn on AirPlay service on 5KPlayer.
After screen mirroring iPhone to Mac, you will see a red recording icon on the center of the playback window, click on it and you will turn 5KPlayer a storage-rescuer. Although there are many programs with airplay function on the market, most of them are not free to use, or some of them need to install plug-ins to achieve AirPlay function.
5KPlayer could be the top of them, for it not only supports sharing iPhone screen to Mac, but also has DLNA function to support streaming from Android to Windows PC and PC to smart TV, so you can control your PC from the mobile phone. Then, above all, it is 100% free and safe to download and use, without any in-software payment and you can use all the features free.


Also read:
- [New] In 2024, Exploring Boundaries Sharing 360 Photos From Mobile Devices
- [New] Navigating Multimedia in Educational Practice for 2024
- [Updated] Create Compelling Compositions with iPhone The Power of Leading Lines
- 2024 Approved How To Find the Optimal Balance Equipment for Drone Photography
- Capture the Action In-Depth Guide to Game Recording on Win10 for 2024
- Comprehensive Assessment of the New Lenovo ThinkPad X1 Carbon (Gen 12): A Fusion of Portability and Smart Tech
- Download & Enjoy - The Ultimate Selection of 6 Best Free Subtitle Tools
- Elevating Visuals with Smart Tech: The Leading 7 AI and Conventional Video Upscalers Compared
- Expert Strategies for Converting WMV to GIFs: Top Techniques to Master Now!
- Hassle-Free Steps for Transforming AVI Videos Into PlayStation Portable (PSP) Compatible Formats
- Leading Video Call Applications for Conference Success for 2024
- Make Your MOD Files Compatible with iPad E - Top-Rated iPad 2 Video Converting Toolkit
- MP4 to FLV Transformation: A Comprehensive Tutorial for Windows and macOS Users
- Quick Fixes for PlayStation Vita Audio Glitches - Tips & Tricks!
- Real-Time Gaming Footage Extraction Made Effortless
- Step-by-Step Guide: Transforming MPEG2 Videos Into AVI Format for Both Mac and PC Users, Without Costs!
- Transforming VOB to 3GP Made Easy: A Step-by-Step Tutorial for Your PC Conversion Process
- Ultimate Guide to Choosing the Right Video Converter (Free vs Paid, Mac vs Windows)
- Various Strategies for Converting MTS Videos for Playback on an iPad
- Title: Top Techniques for Displaying Your iPhonescreen on macOS Devices
- Author: Kenneth
- Created at : 2024-09-30 00:50:22
- Updated at : 2024-09-30 16:31:29
- Link: https://media-tips.techidaily.com/top-techniques-for-displaying-your-iphonescreen-on-macos-devices/
- License: This work is licensed under CC BY-NC-SA 4.0.