
Step-by-Step Guide: Setting Up Song Crossfading Feature on Apple Music

Step-by-Step Guide: Setting Up Song Crossfading Feature on Apple Music
Quick Links
- How to Enable the Crossfade Feature in Apple Music on Your iPhone or iPad
- How to Enable the Crossfade Feature in Apple Music on Your Android Device
- How to Enable the Crossfade Feature in Apple Music on Mac
- How to Enable the Crossfade Feature in Apple Music on Windows
Key Takeaways
- Open the Apple Music settings on your device and find the “Crossfade” option, which may be listed under “Playback.”
Do you hate the awkward silence between songs in your Apple Music playlist? You can fix that with the crossfade feature, which smoothly blends one song into the next for a continuous listening experience, and it’s available for iPhone, iPad, Android, Mac, and Windows.
How to Enable the Crossfade Feature in Apple Music on Your iPhone or iPad
To enable crossfade on an iPhone or iPad, go to Settings > Music > Crossfade. This feature was introduced in iOS 17 and iPadOS 17 , and it blends tracks with a smooth fade transition. After enabling this feature, you’ll see that as the current song nears its end, it slowly fades out while the next one gradually fades in, creating a perfectly continuous listening experience.
To enable the crossfade feature in Apple Music on your iPhone or iPad, open the “Settings” app and tap “Music.”

Enable the toggle next to “Crossfade” and then use the slider to adjust the duration between the current song fading out and the next song fading in.

And that’s about it. You can now play the Apple Music app on your iPhone or iPad and experience the smooth transition between songs caused by the crossfade feature.
How to Enable the Crossfade Feature in Apple Music on Your Android Device
To enable the crossfade feature in Apple Music on Android, open the Settings menu in the app and choose “Crossfade.” Surprisingly, the Android version of Apple Music had this feature even before it arrived on the iPhone and iPad.
First, open the Apple Music app , tap the three-dot menu icon in the top-right corner, and choose “Settings” from the menu that pops up.

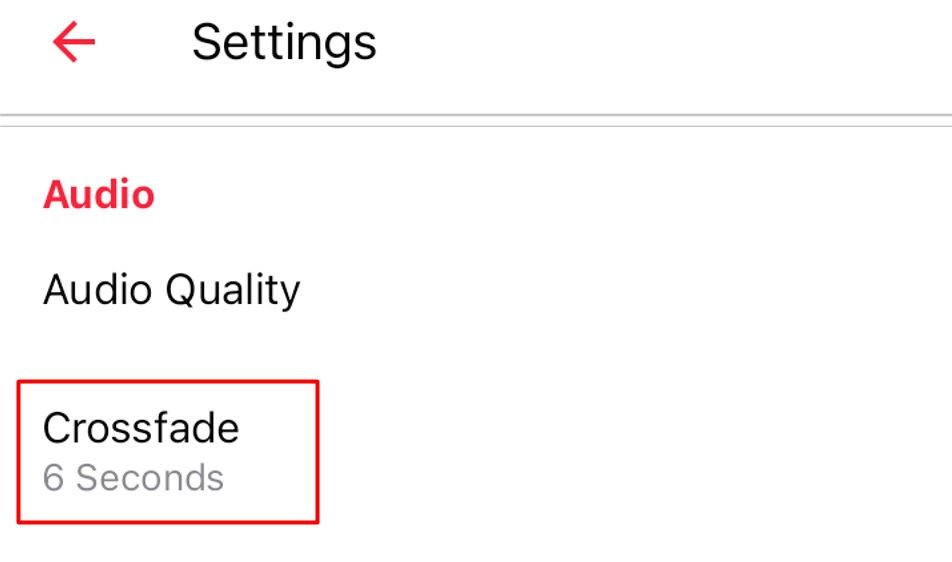
Tap the “Crossfade” option under the Audio section.
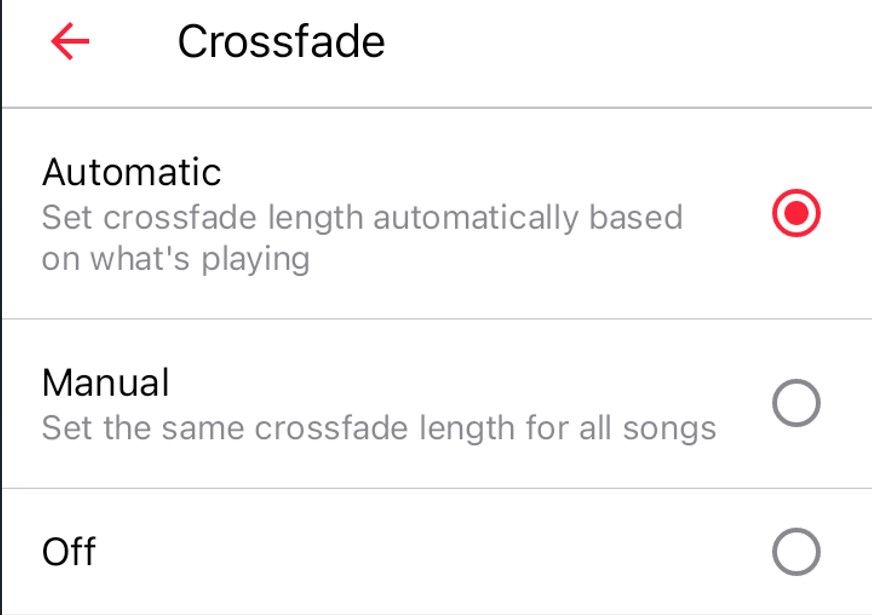
You can choose between “Automatic” and “Manual” crossfade. The automatic option automatically sets the crossfade length based on the length and genre of the song that’s playing. If you want to set the same length for all songs, you can choose the manual option.
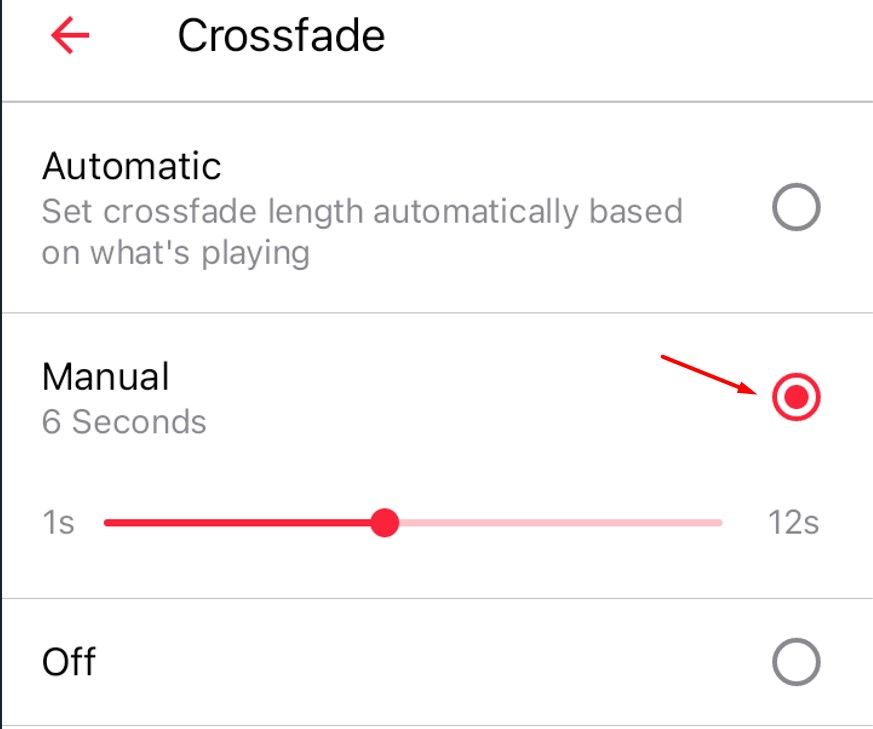
If you choose the manual option, use the slider to adjust the crossfade length between songs.
In the future, if you want to turn off the crossfade feature, you can choose the “Off” option.
How to Enable the Crossfade Feature in Apple Music on Mac
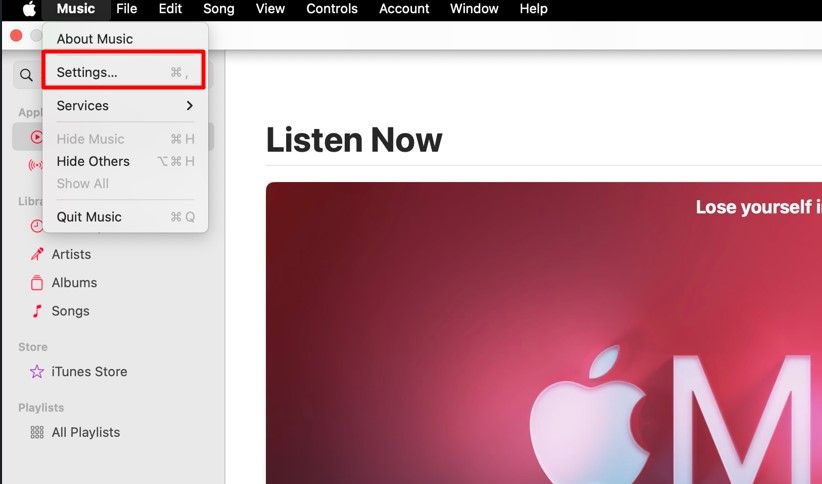
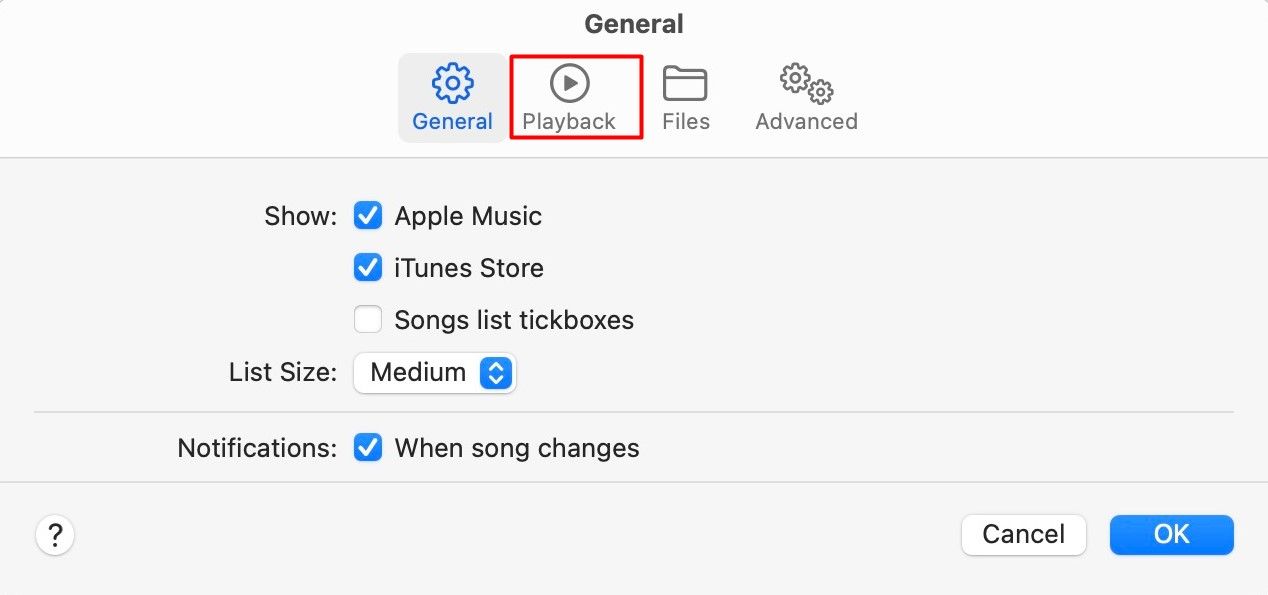
To enable crossfade on a Mac, you can go to the “Playback” tab in the Settings and toggle on “Crossfade.” First, launch the Apple Music app on your Mac, choose “Music” from the menubar, and then select “Settings” from the menu that appears.
Click the “Playback” tab.
Check the box for “Crossfade Songs” and then use the slider to set the duration between the current song fading out and the next song fading in. Then, click “OK” to save the changes.
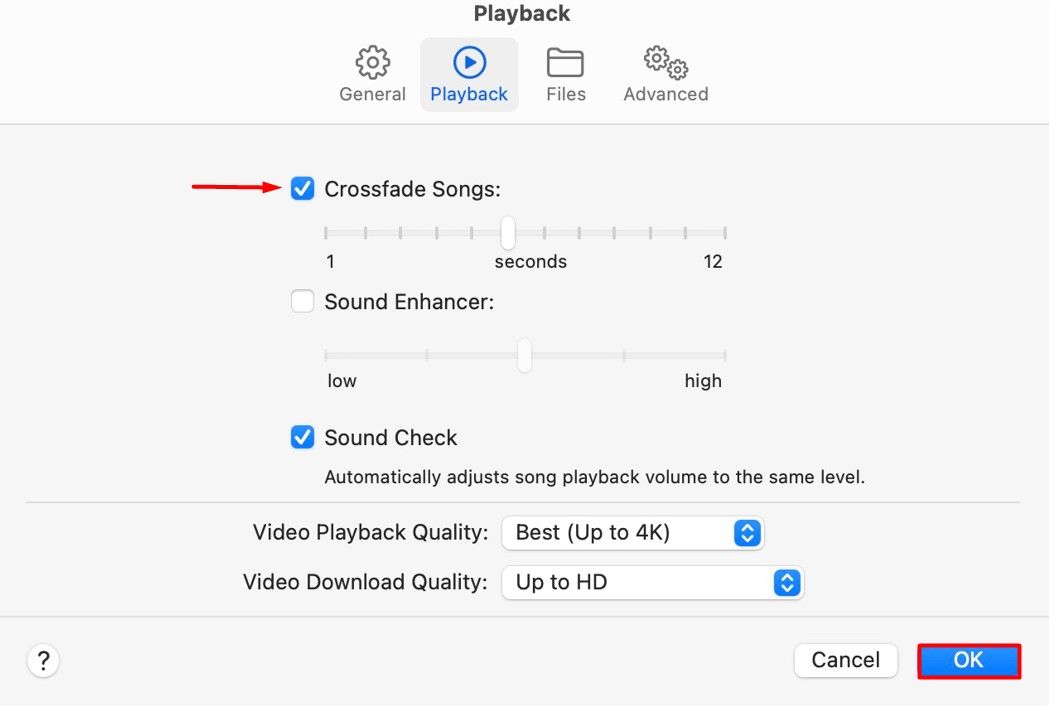
You can now enjoy the crossfade effect in the Apple Music app on your Mac.
How to Enable the Crossfade Feature in Apple Music on Windows
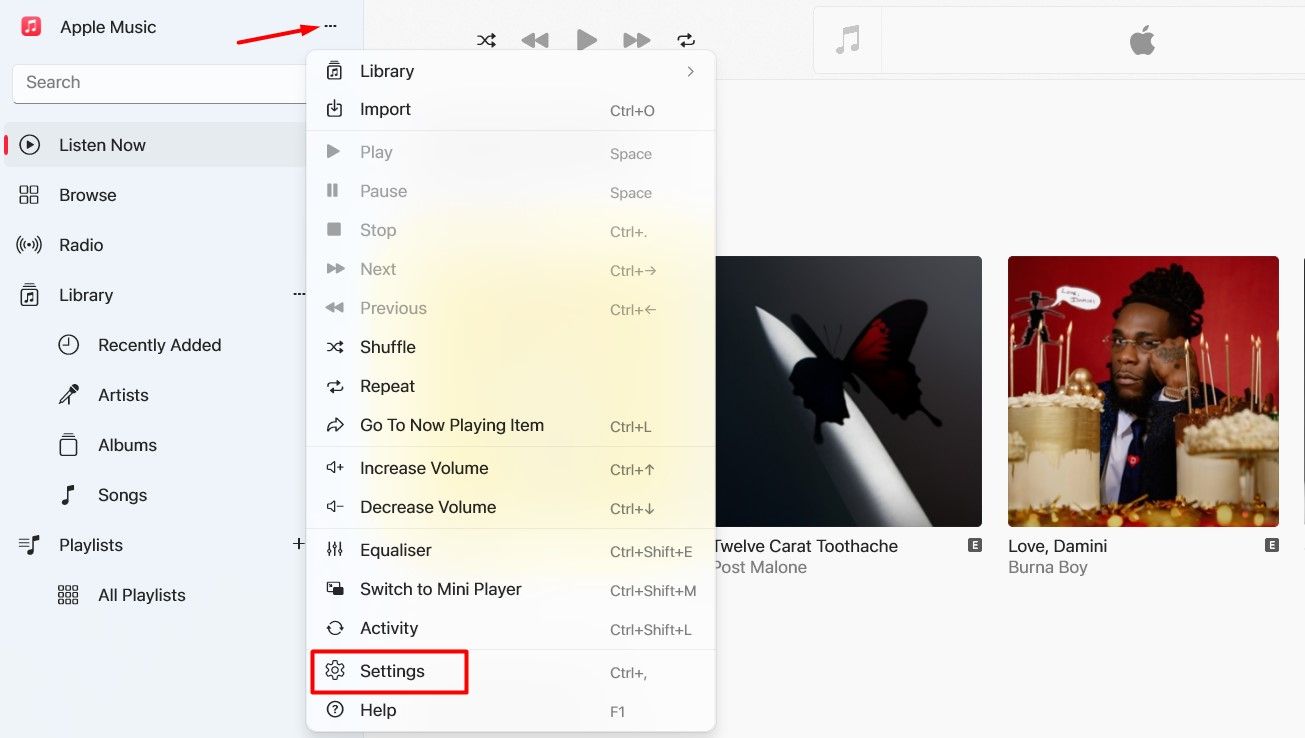
Crossfade can be enabled in the Windows app by going to the “Playback” tab in the Settings and checking the “Crossfade” option. To get started, open the Apple Music app on your Windows computer, click the three-dot menu icon in the left sidebar, and choose “Settings” from the menu that appears.
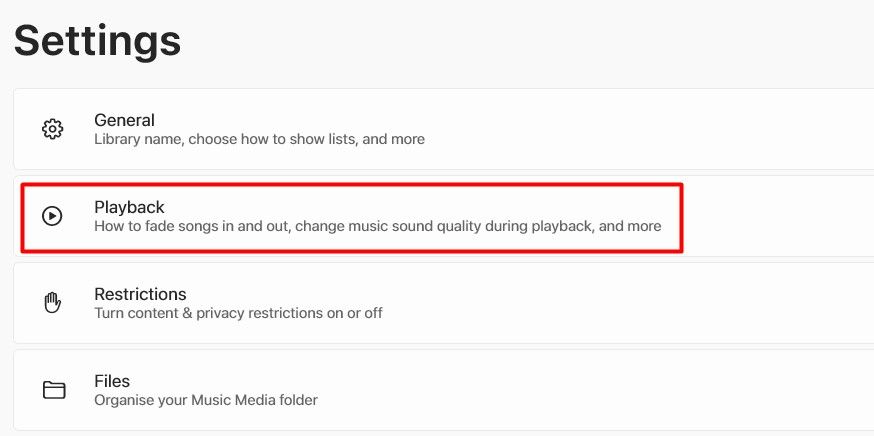
Click the “Playback” option.
Turn on the toggle next to “Crossfade” and then adjust the “Duration” slider.
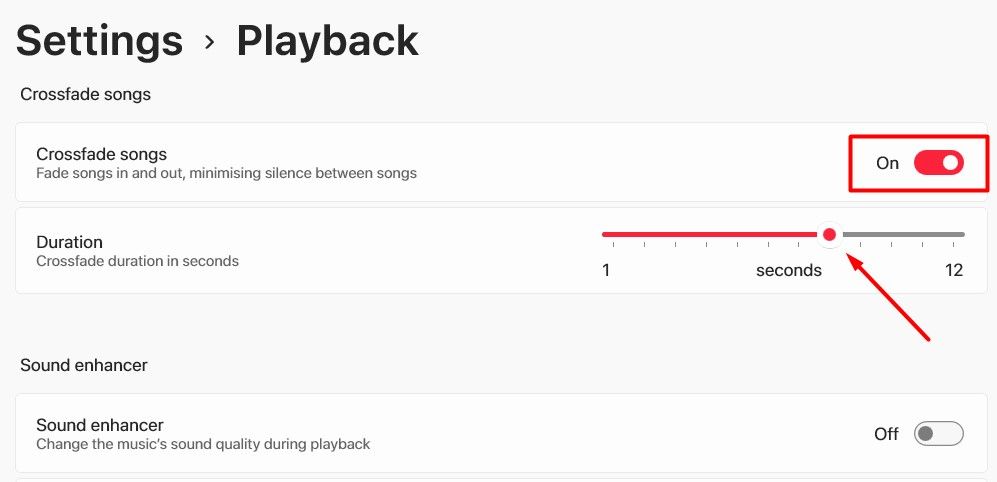
After that, restart the Apple Music app. Upon restart, you will experience the crossfade feature between songs.
Crossfade is a small but interesting feature that improves your music listening experience. However, it’s disabled by default in Apple Music across all platforms. But, as you now know, you can easily enable it on different platforms using the steps above.i m
Also read:
- [New] In 2024, Ace List of Low-Cost YouTube Caption Tools
- [Updated] Fusing Music and Photos Online for 2024
- [Updated] In 2024, Top 10 Text Boosting Techniques in Videos
- Big Waters, Better Views - Top 5 Fishing Cams
- How to Turn Off Google Location to Stop Tracking You on Oppo A78 | Dr.fone
- In 2024, Immersive Image Editing Online Cropping Essentials
- Innovative Zoom Methods for Chromebook Efficiency for 2024
- Mastering Multi-Format Conversion: Change Your Media to MP4, 3GP, WMV & More with Superior Total Video Converter
- Mastering the MP4 File Type: A Comprehensive Resource for Every Thing You Must Know
- Preserve Precision with Easy AVCHD to AVI Conversion – Follow These Simple Steps!
- Save Your Gameplay Moments with Xbox Screen Recordings
- Step-by-Step Guide: Converting MXF Files to MOV Format on Your Mac - Solutions Inside
- Step-by-Step How-To: Converting AVI Files to MOV for Both PC and Mac Users
- Top Resources for Farsi Movie Subtitles Download & Steps to Integrate Them Into Videos
- Transforming QuickTime MOV Files Into WebM Format: 7 Simple, No-Cost Online Methods
- Title: Step-by-Step Guide: Setting Up Song Crossfading Feature on Apple Music
- Author: Kenneth
- Created at : 2024-09-23 18:46:28
- Updated at : 2024-09-30 22:29:09
- Link: https://media-tips.techidaily.com/step-by-step-guide-setting-up-song-crossfading-feature-on-apple-music/
- License: This work is licensed under CC BY-NC-SA 4.0.