Listen Securely: Four Essential Tricks to Maintain Anonymity with Apple Music

Listen Securely: Four Essential Tricks to Maintain Anonymity with Apple Music
Quick Links
- What Is “Discoverable by Nearby Contacts” and How Do I Turn It Off?
- How to Stop Sharing Your Music Activity With Followers
- How to Stop Sharing Playlists With Followers
- How to Stop Showing Listening Activity on Your Profile
- How to Delete Your Apple Music Profile
Key Takeaways
- Manage privacy on Apple Music by turning off shared listening and playlist sharing to control who sees your activity.
- Adjust the “Discoverable by Nearby Contacts” setting to prevent others from joining your CarPlay sessions without your permission.
- Deleting your Apple Music profile removes shared playlists and listening history from your account, keeping your activity private.
Apple Music shares your listening activity with followers and advertises your presence to nearby devices. Apple doesn’t include a simple “Incognito Listening” toggle, so here’s how you can configure Apple Music to prevent it from leaking what you listen to or making you discoverable to nearby contacts.
What Is “Discoverable by Nearby Contacts” and How Do I Turn It Off?
Apple Music has a setting called “Discoverable by Nearby Contacts” enabled by default, which at first glance may sound alarming. Despite the scary name, it exists to let car passengers quickly join your CarPlay music sessions by scanning Bluetooth for nearby devices.
It doesn’t share your name, song preferences, or GPS location information, and Bluetooth is only used for proximity information. But if you don’t have CarPlay, you can turn it off.
Open the Settings app on your iPhone and select “Music” from the main list, then scroll down to the “Shared Listening” heading and disable the “Discoverable by Nearby Contacts” toggle.
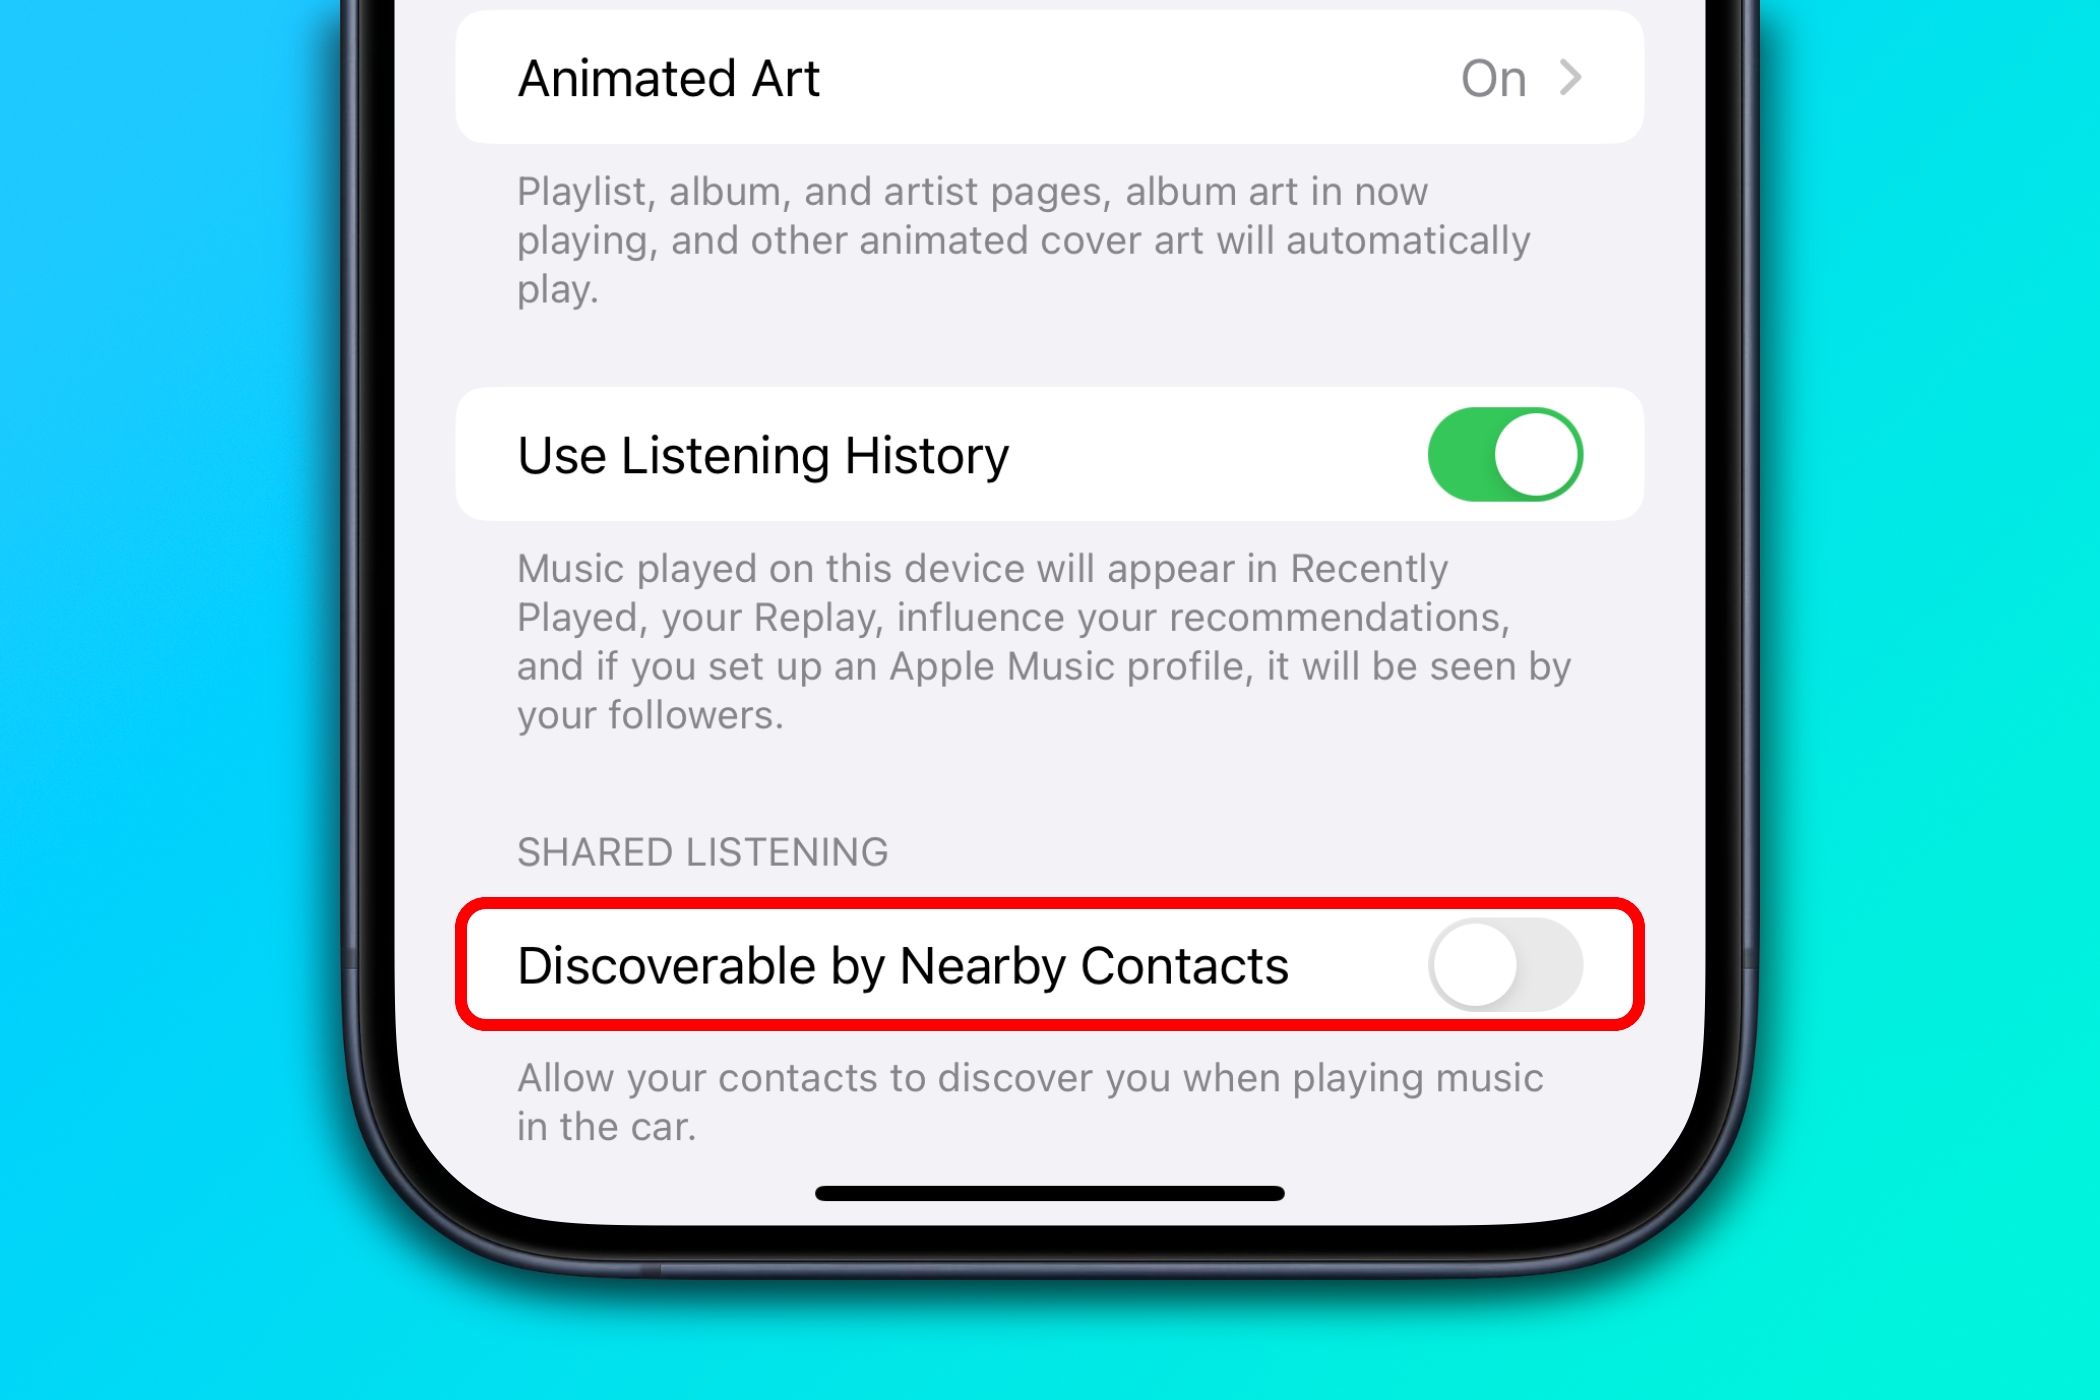
With that done, devices in very close proximity to your iPhone will no longer be able to detect it. Passengers wanting to request songs and take over music playback will need to scan a QR code on a SharePlay card in the Music app on your iPhone.
Turning off “Discoverable by Nearby Contacts” negatively affects playlist collaboration and shared listening.
How to Stop Sharing Your Music Activity With Followers
When you create an Apple Music profile, it’s set to automatically share the songs you listen to with others on your profile. To fix this and make your Apple Music activity a bit more private, restrict sharing to approved followers while blocking others.
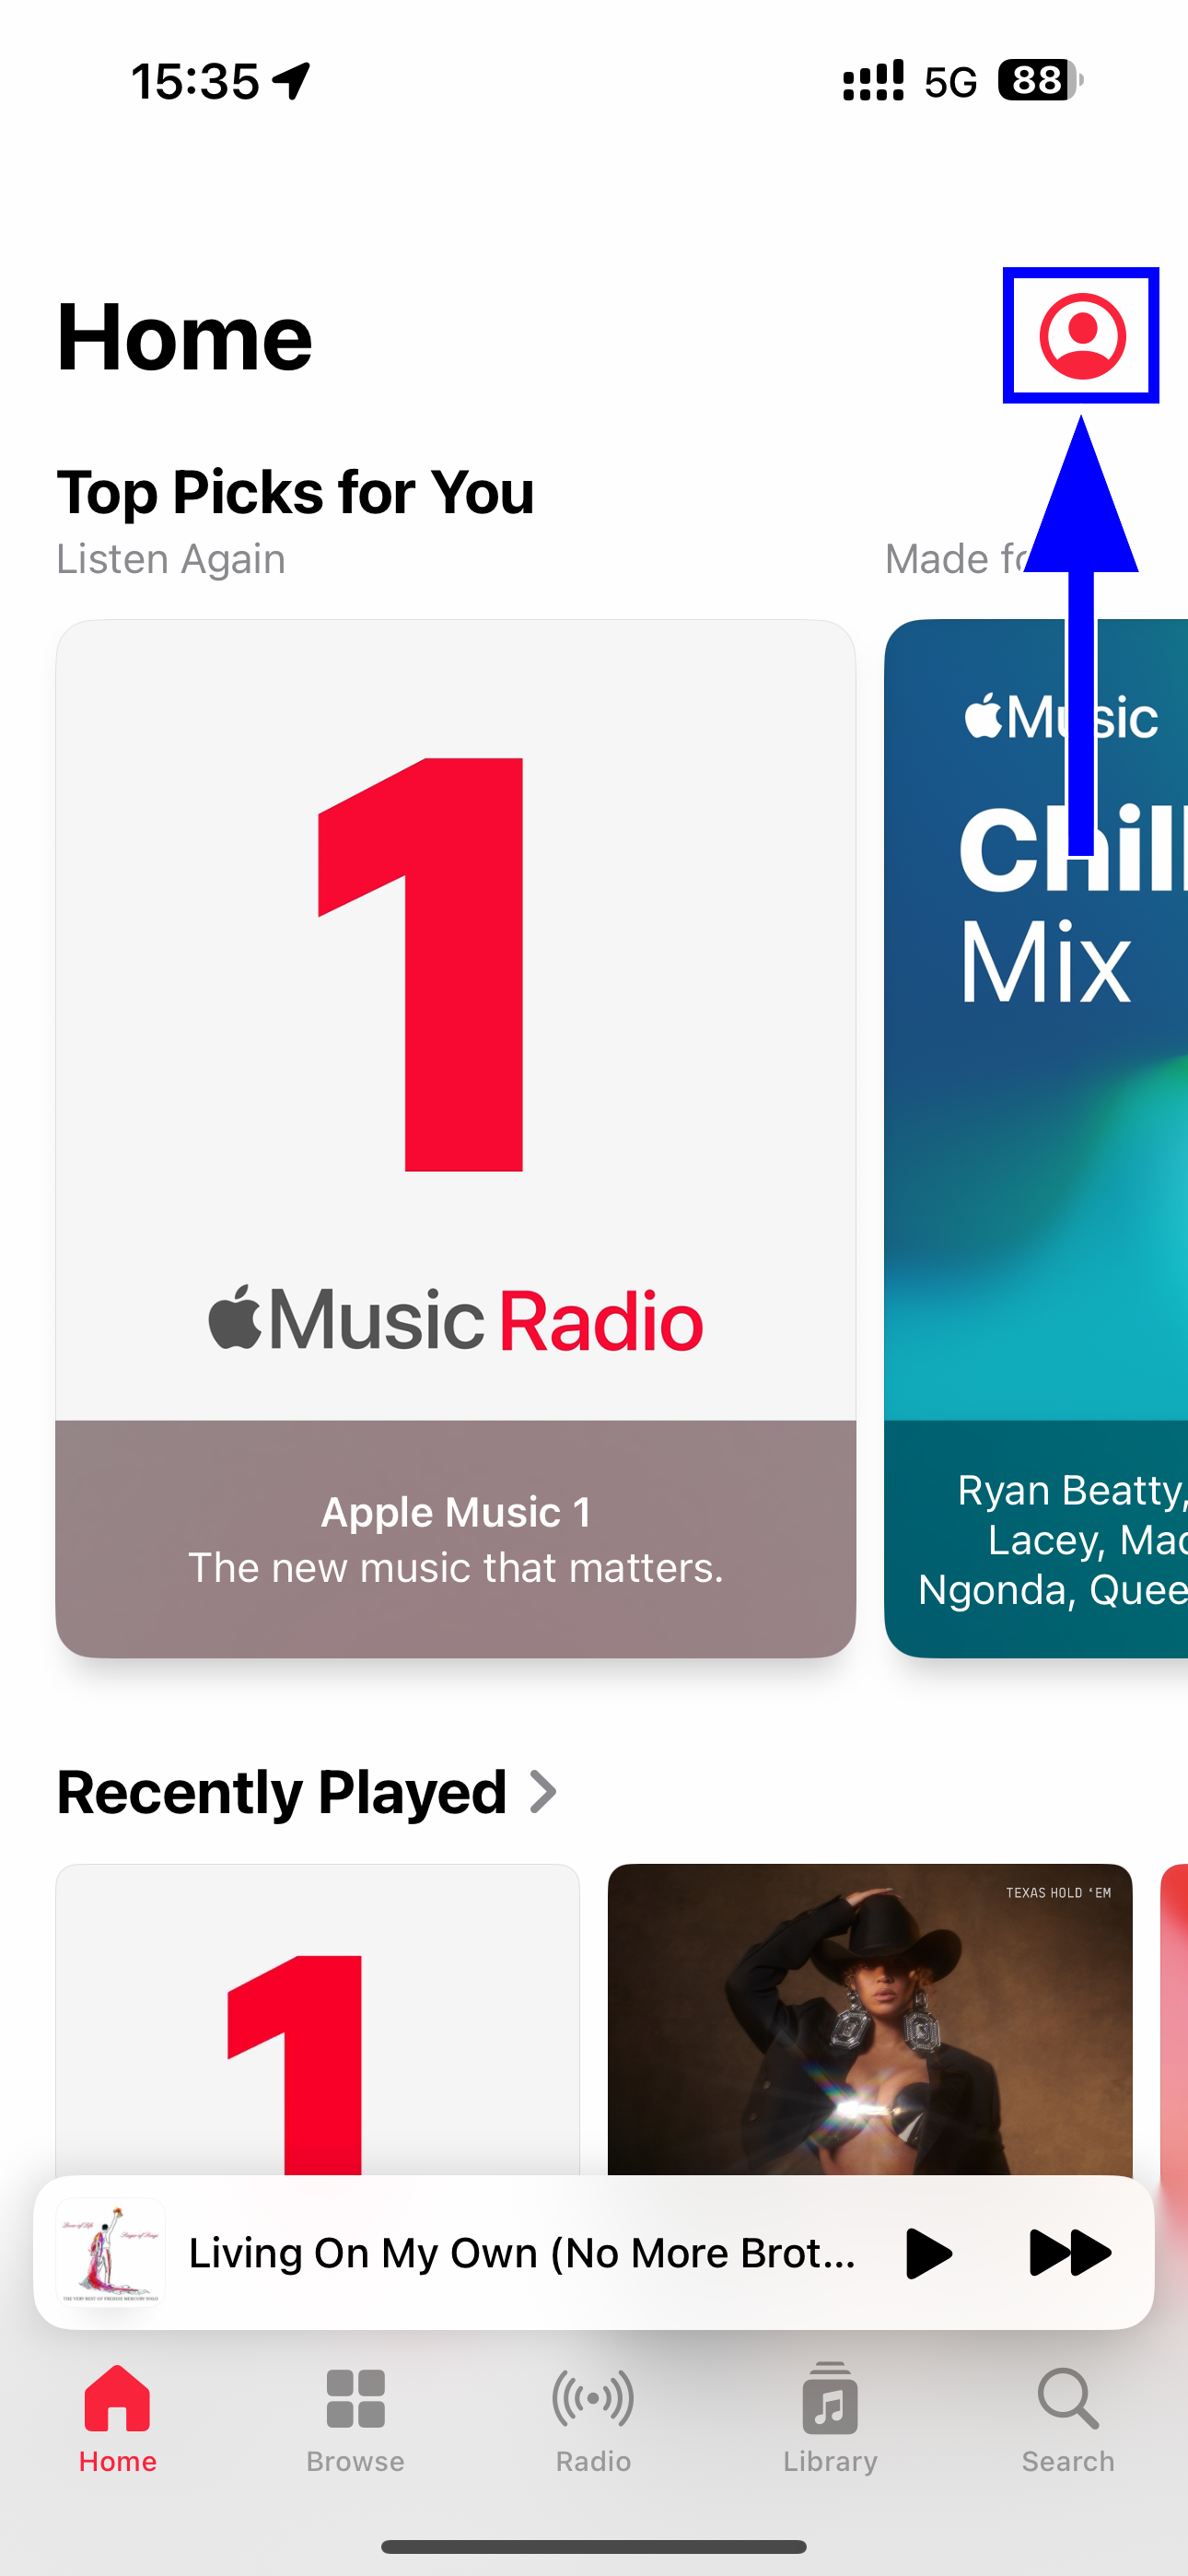
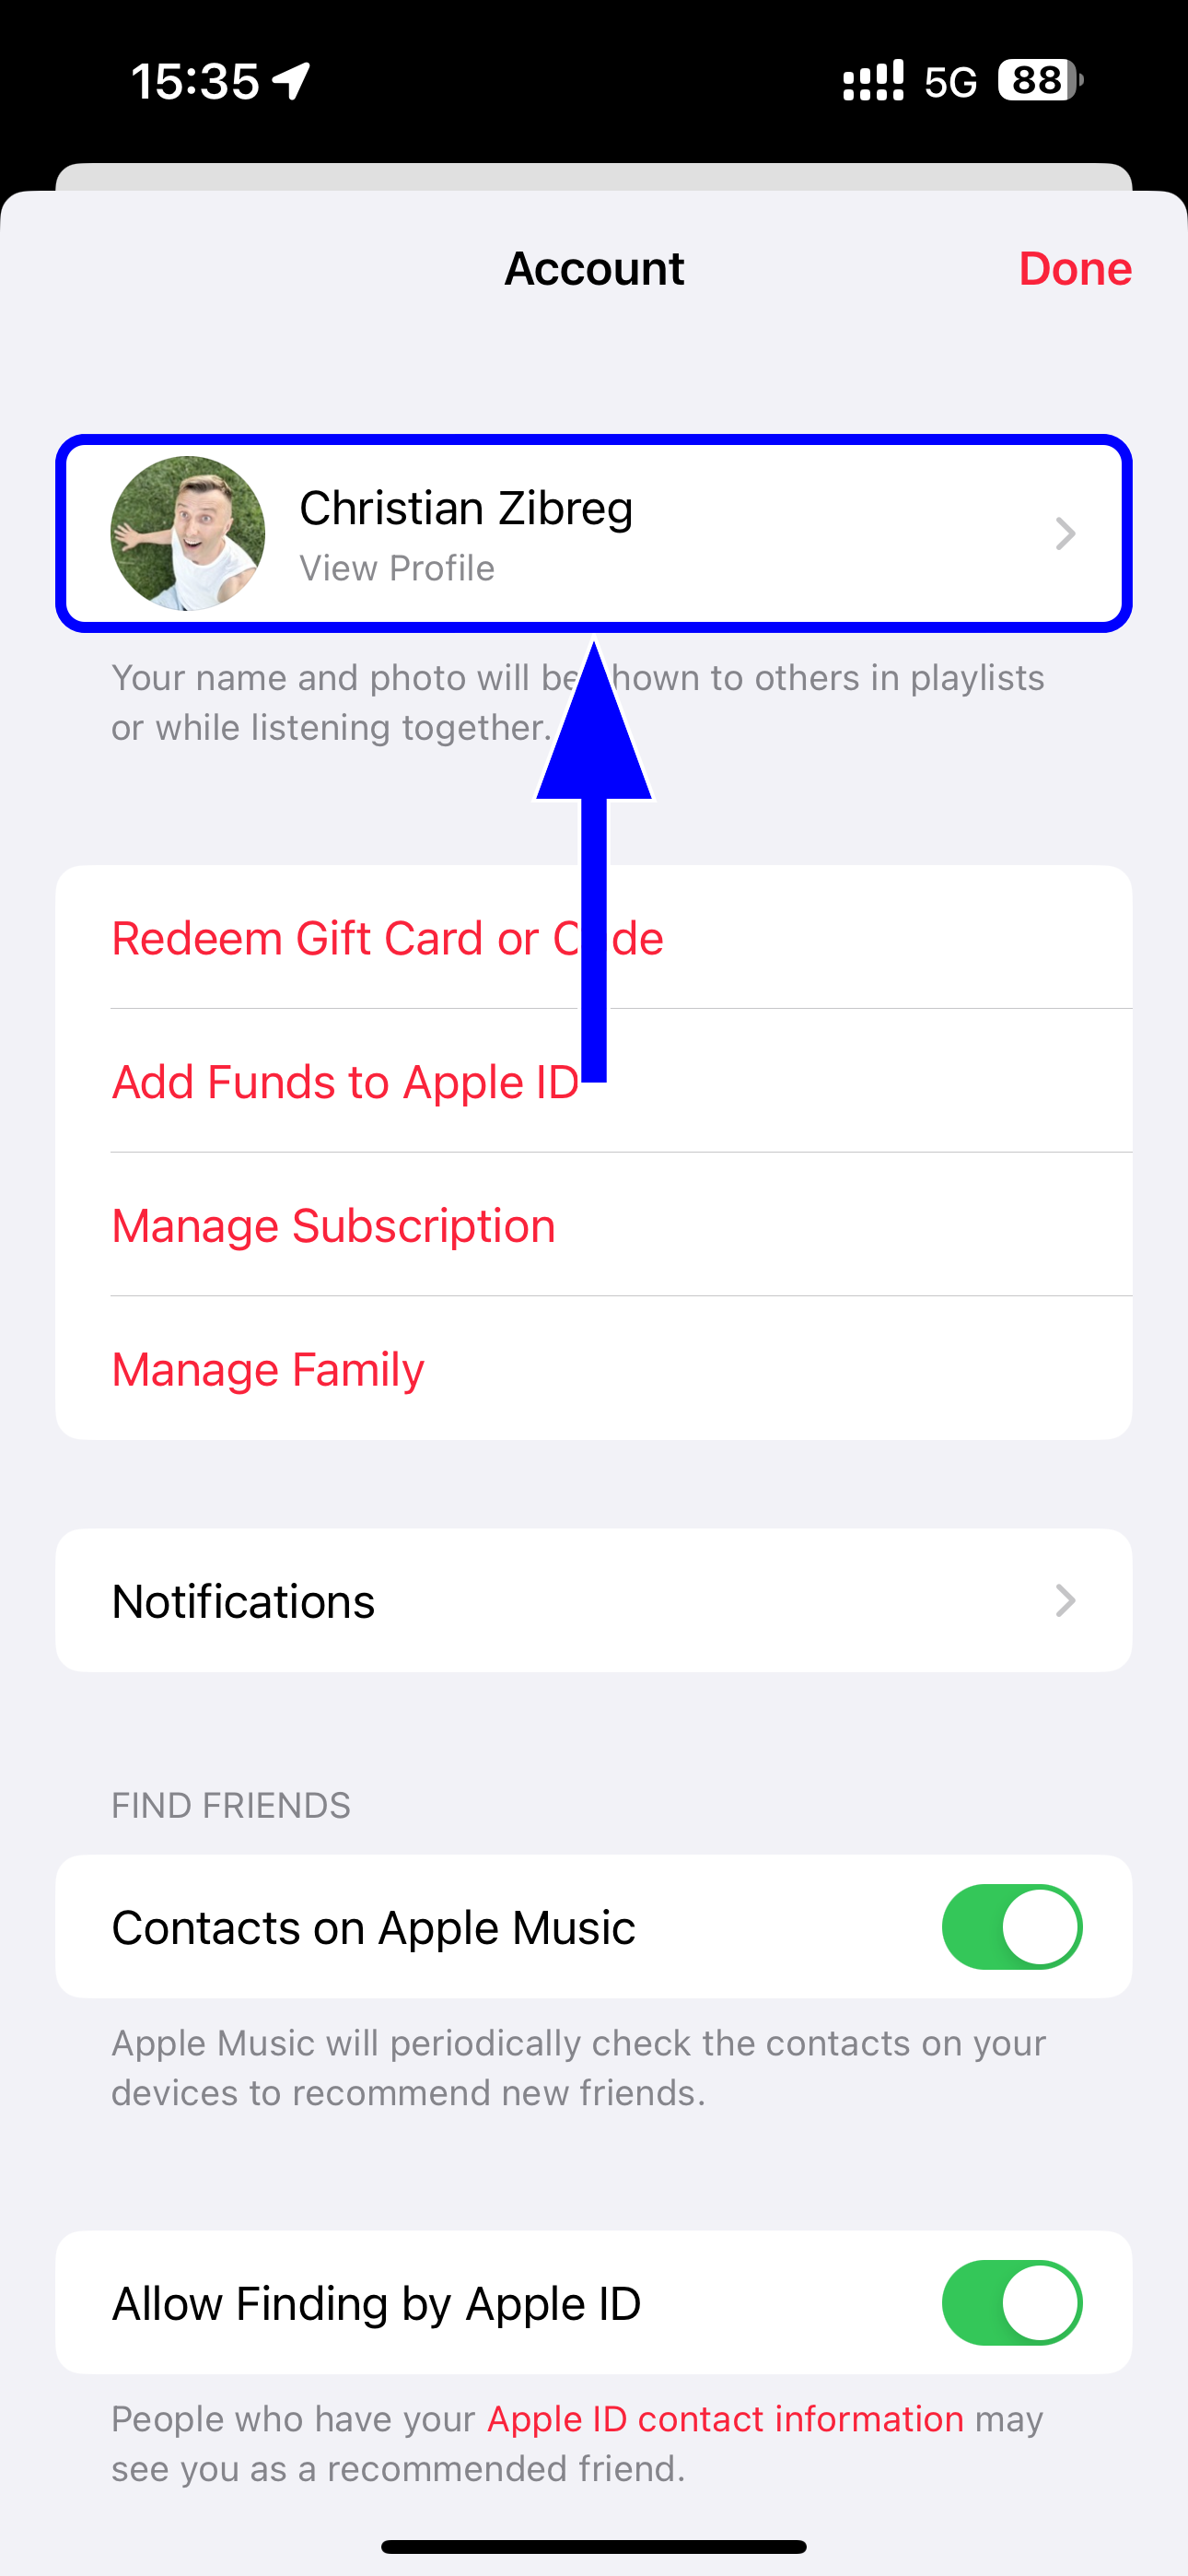
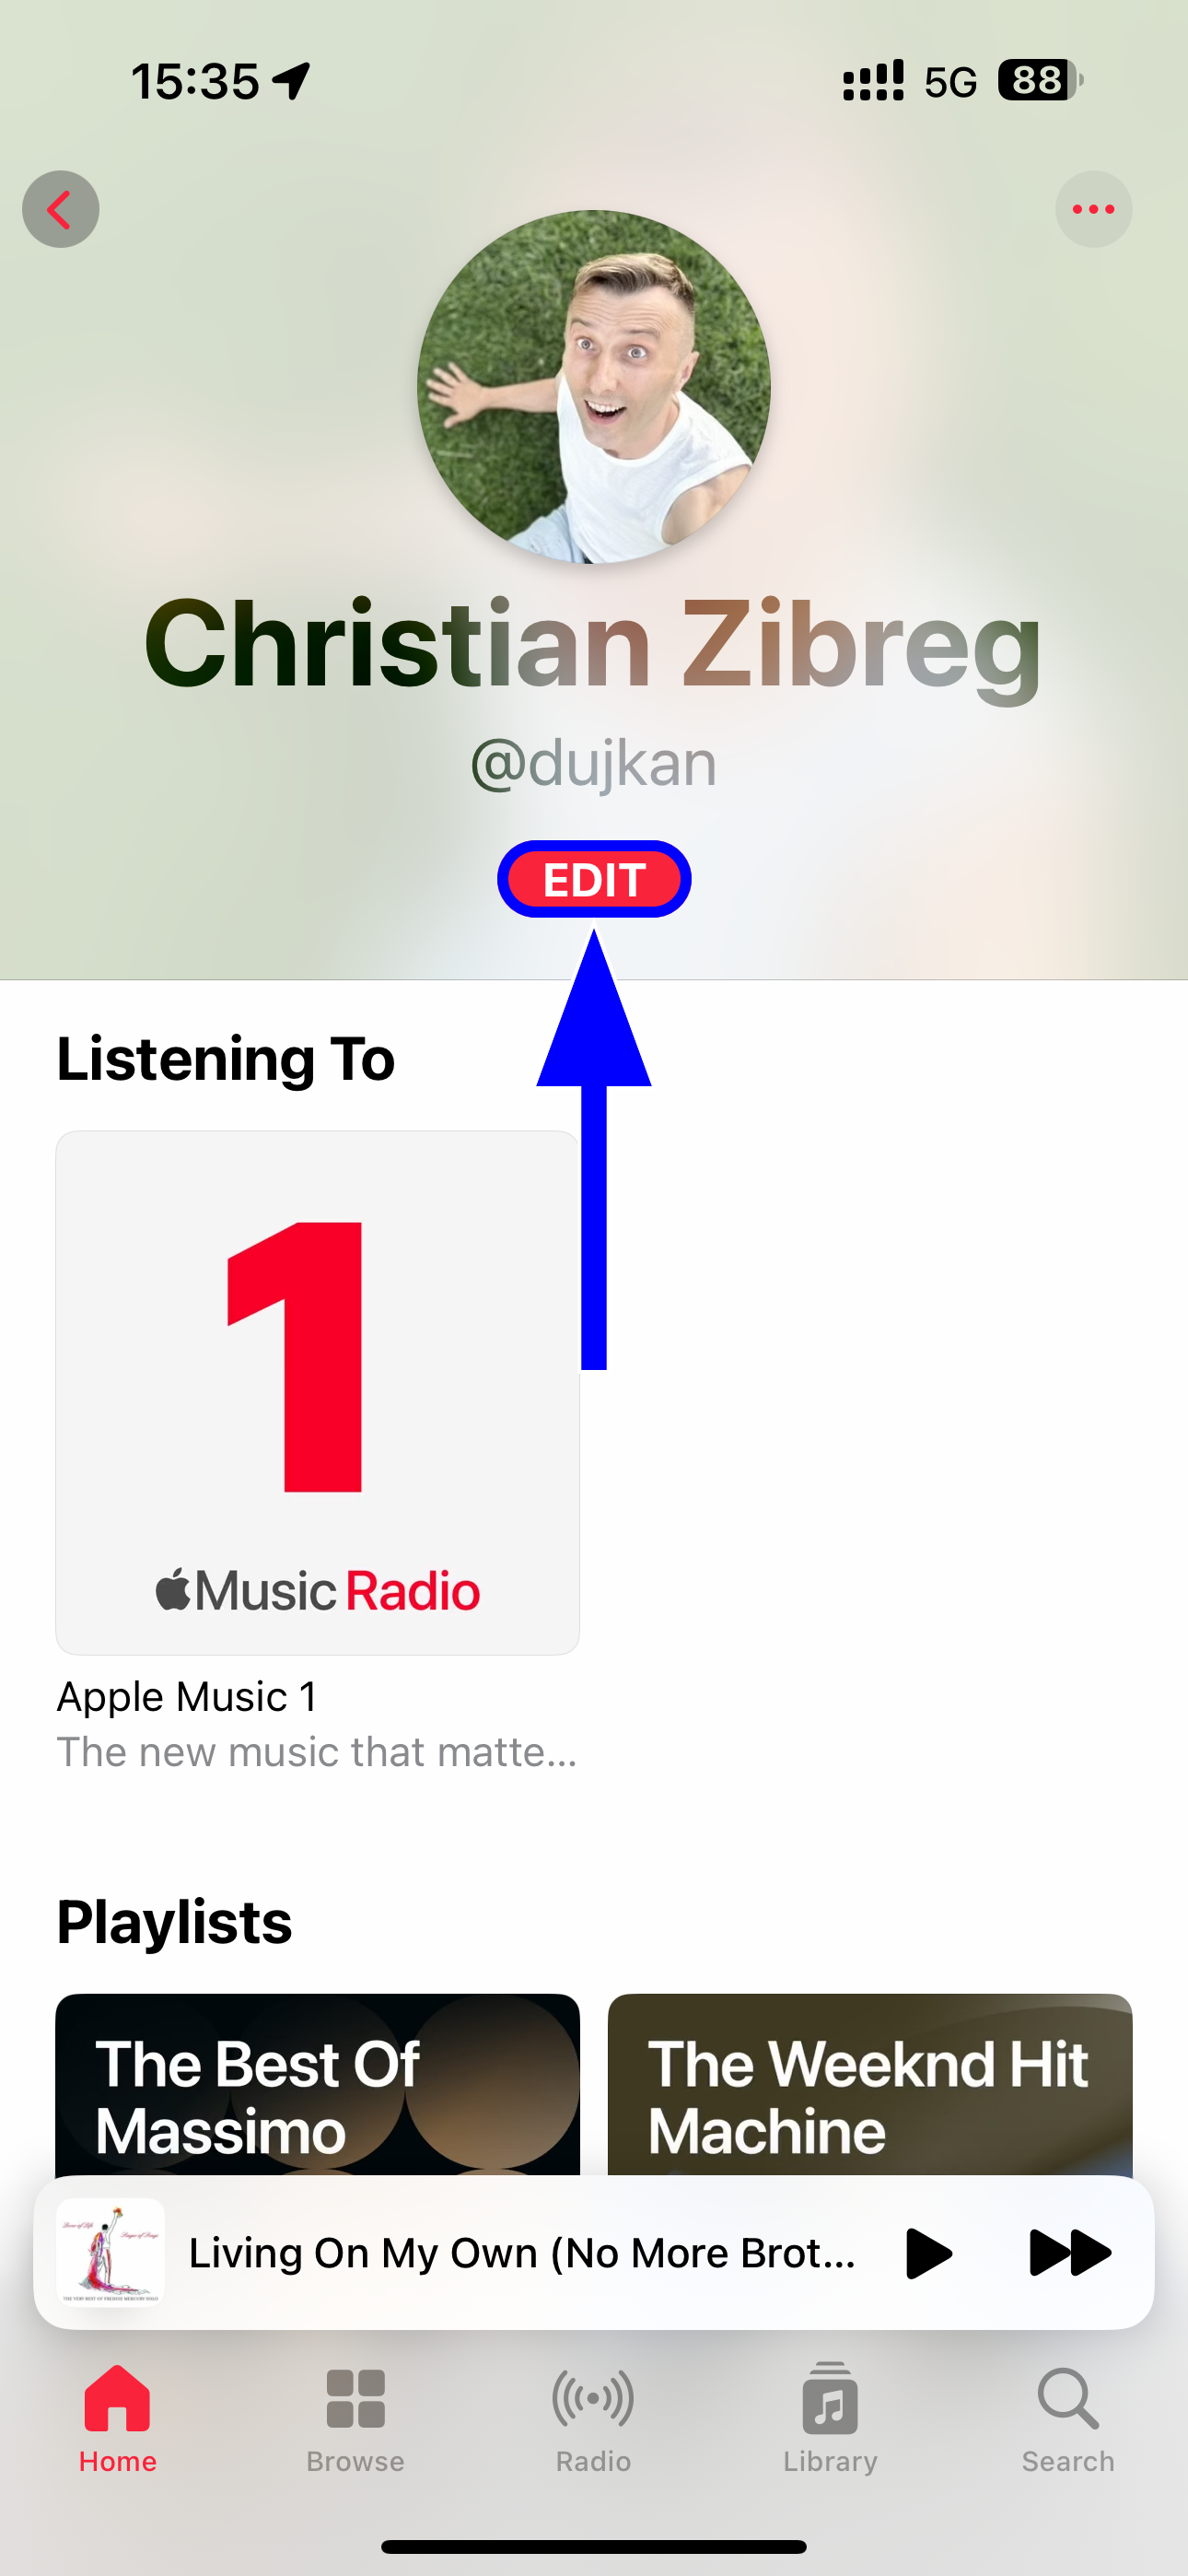
On an iPhone and iPad,open the Music app, select the “Home” tab, hit your account in the top-right corner, select “View Account” at the top, and choose “Edit” below your profile image.
Close
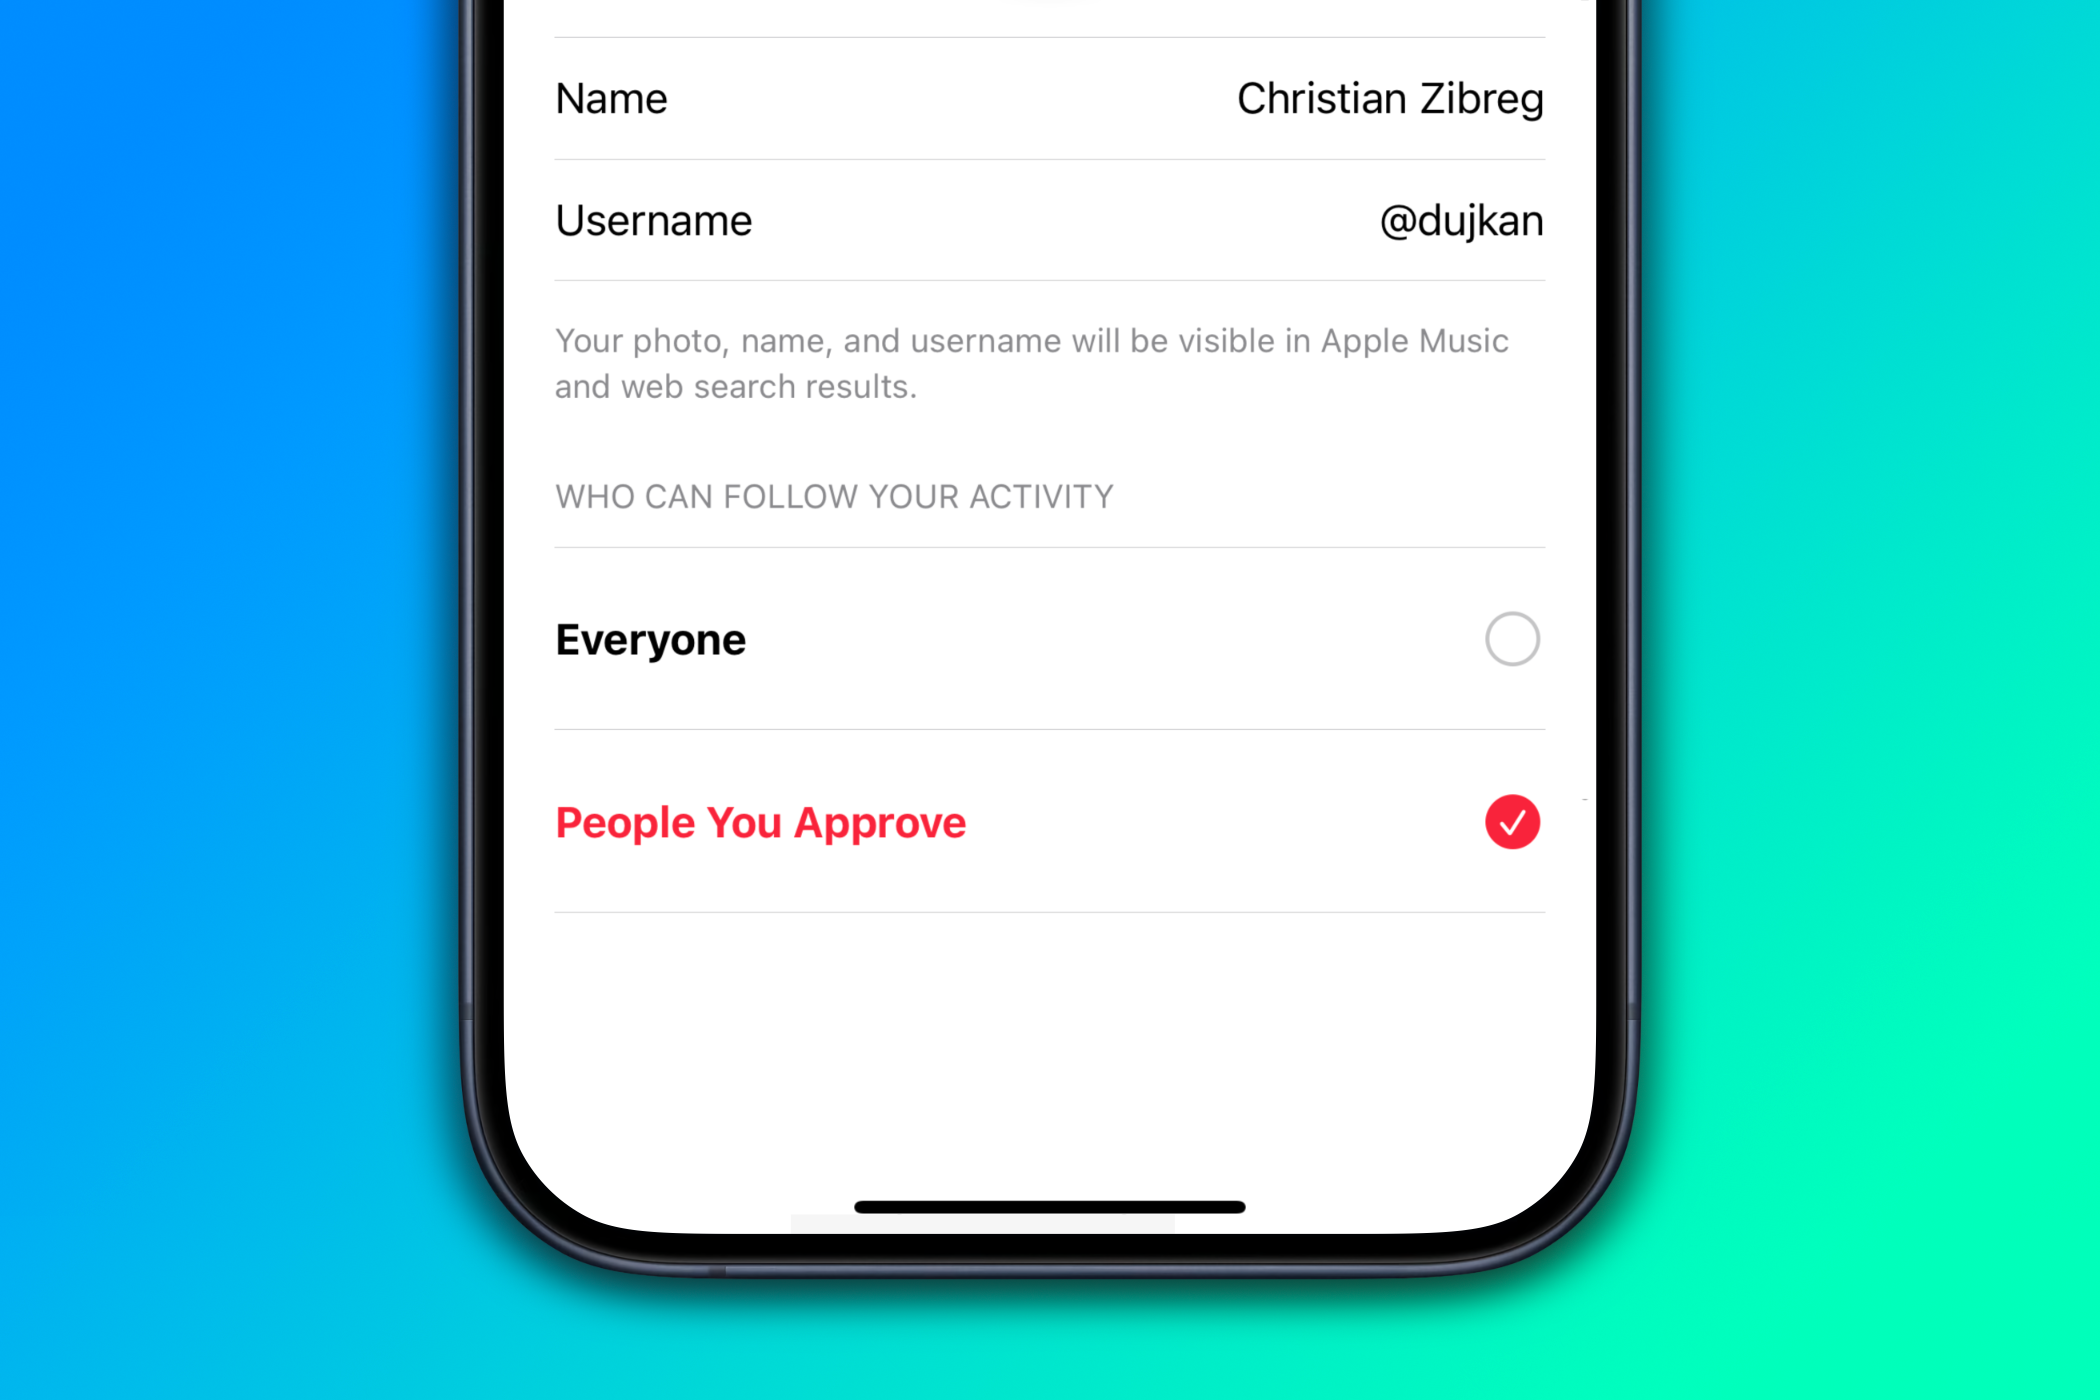
Next, select the radio button “People You Approve” under the “Who Can Follow Your Activity” section, and hit “Done” to save your changes.
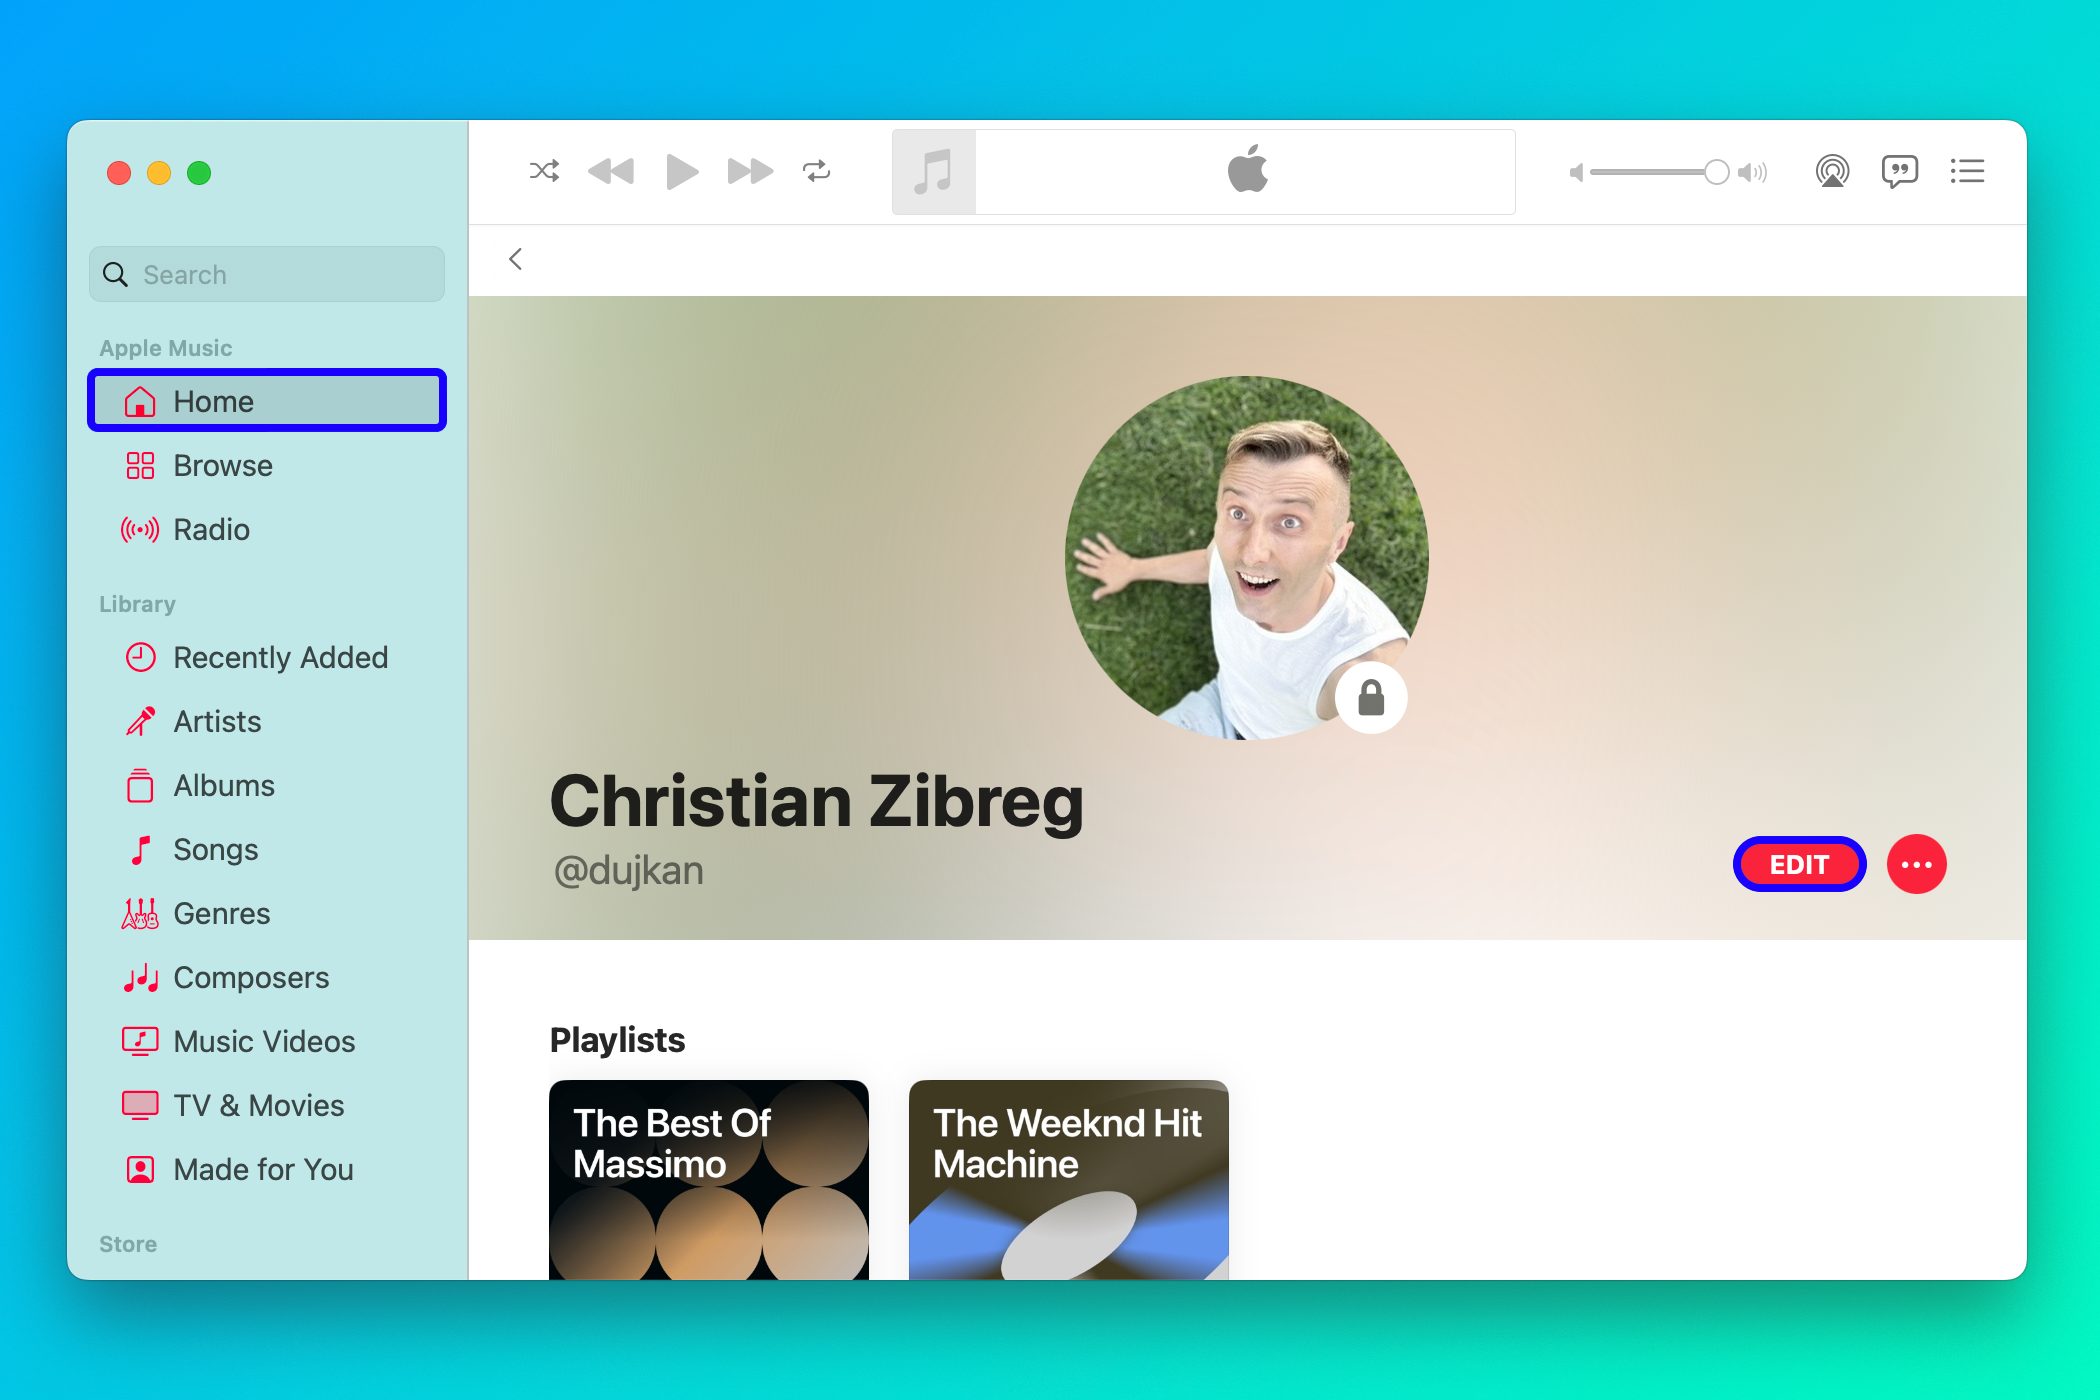
On a Mac,launch the Music app, click “Home” in the sidebar underneath the “Apple Music” heading, choose your profile in the top-right corner, and click “Edit” below your profile image.
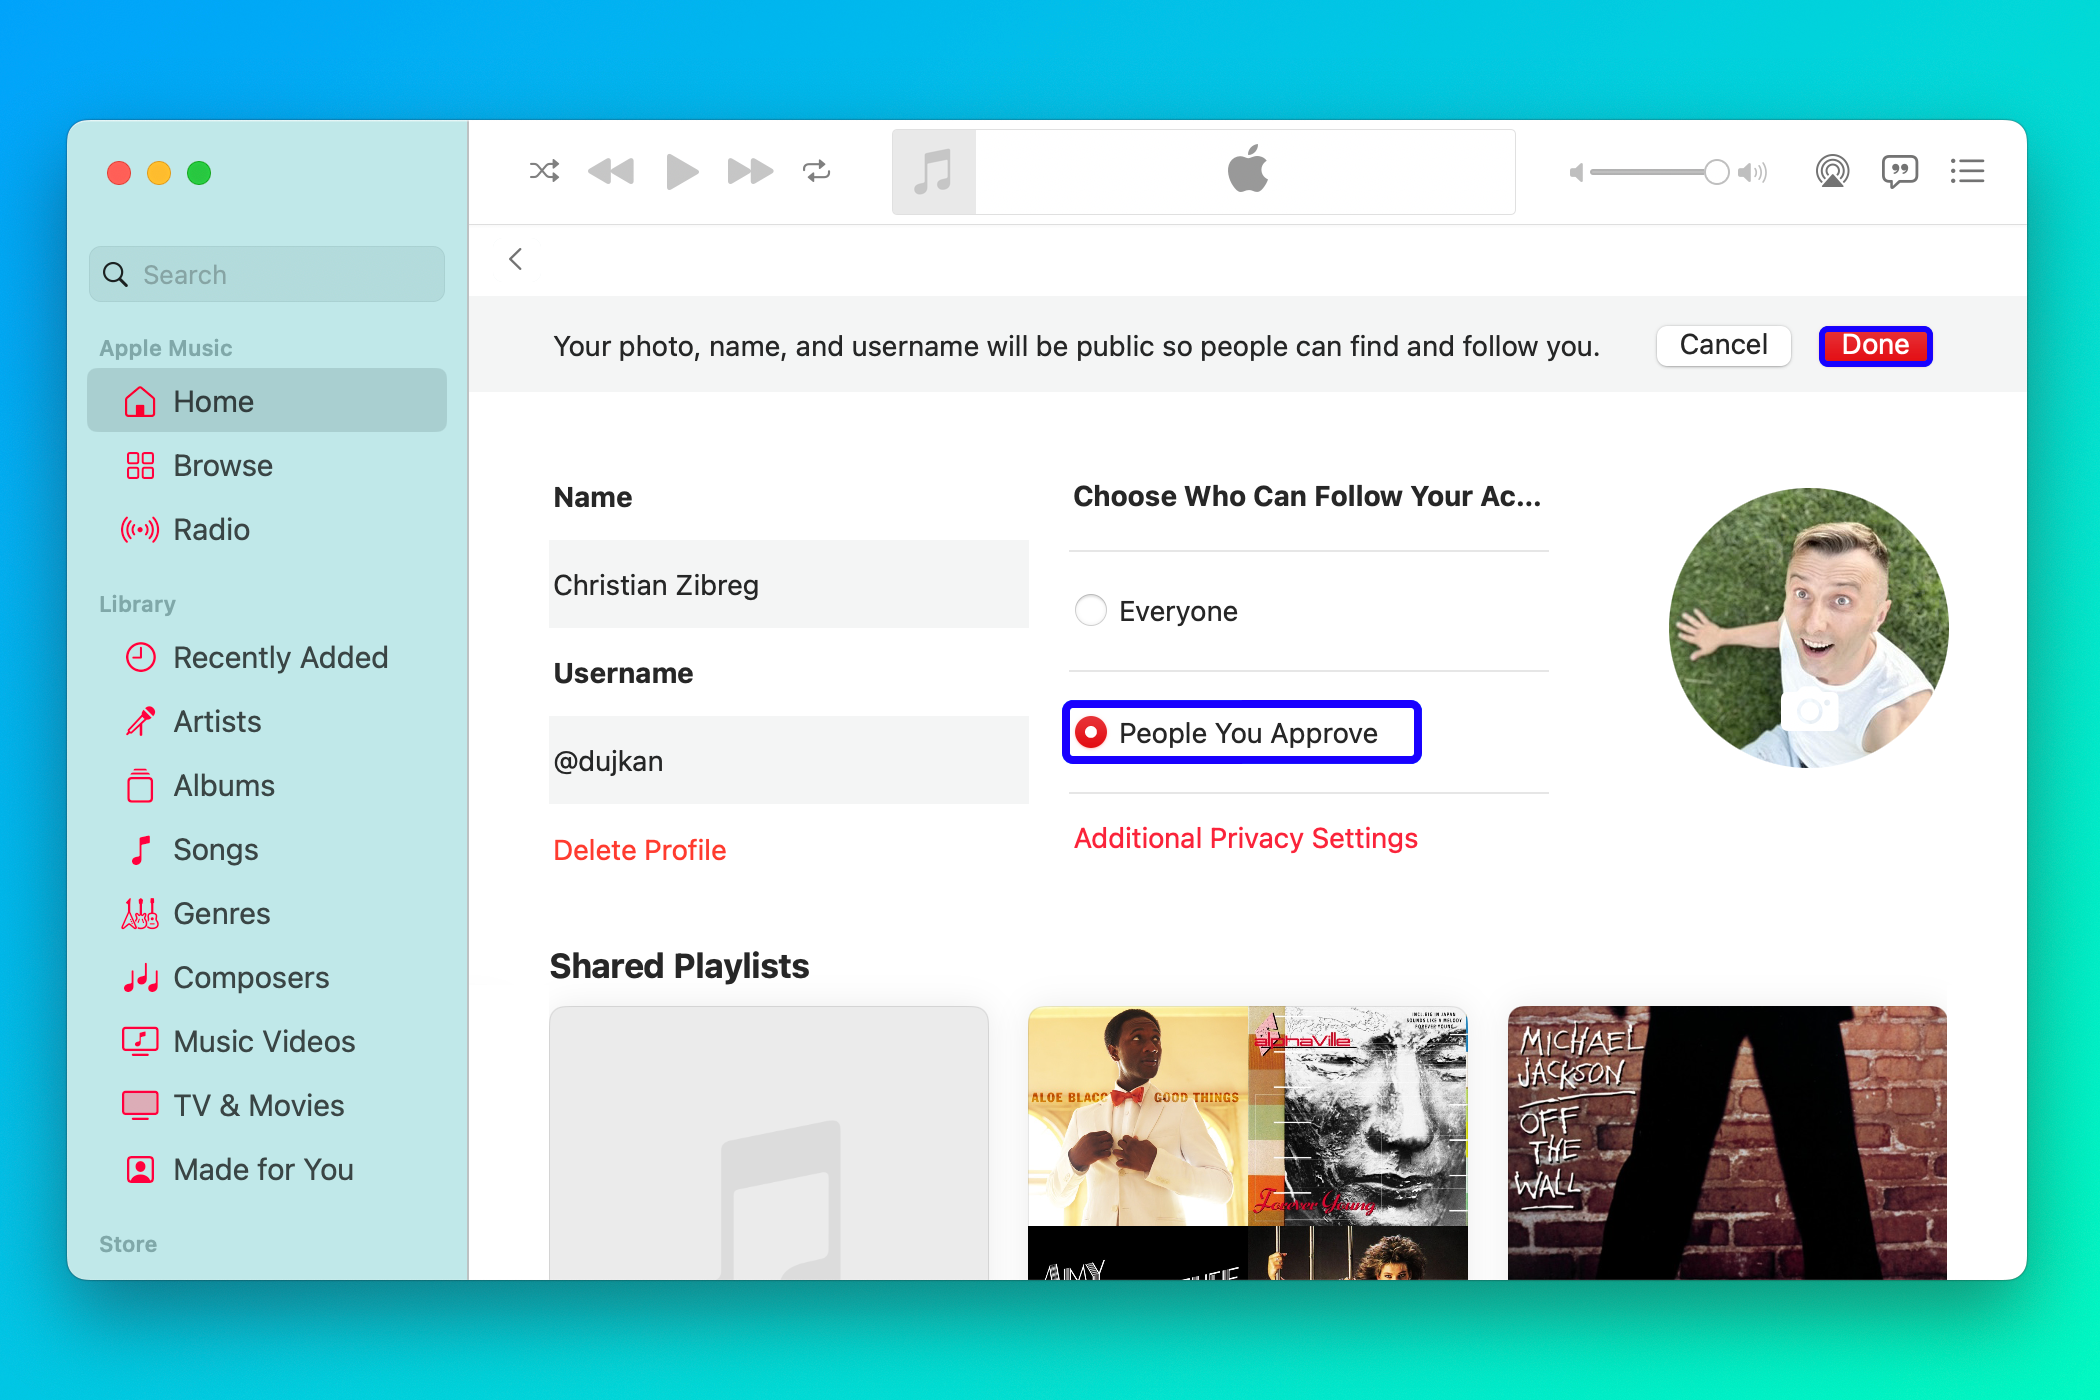
Now click the “People You Approve” radio button below the section labeled “Choose Who Can Follow Your Activity.” Don’t forget to click “Done” to save changes!
If you have an Apple Music profile, you cannot opt out of sharing your activity with approved followers unless you permanently delete it.
How to Stop Sharing Playlists With Followers
When creating your Apple Music profile, you may have cherry-picked some playlists to share with your followers. These show up on followers’ profiles as shared by you, but you can easily remove them with a few clicks.
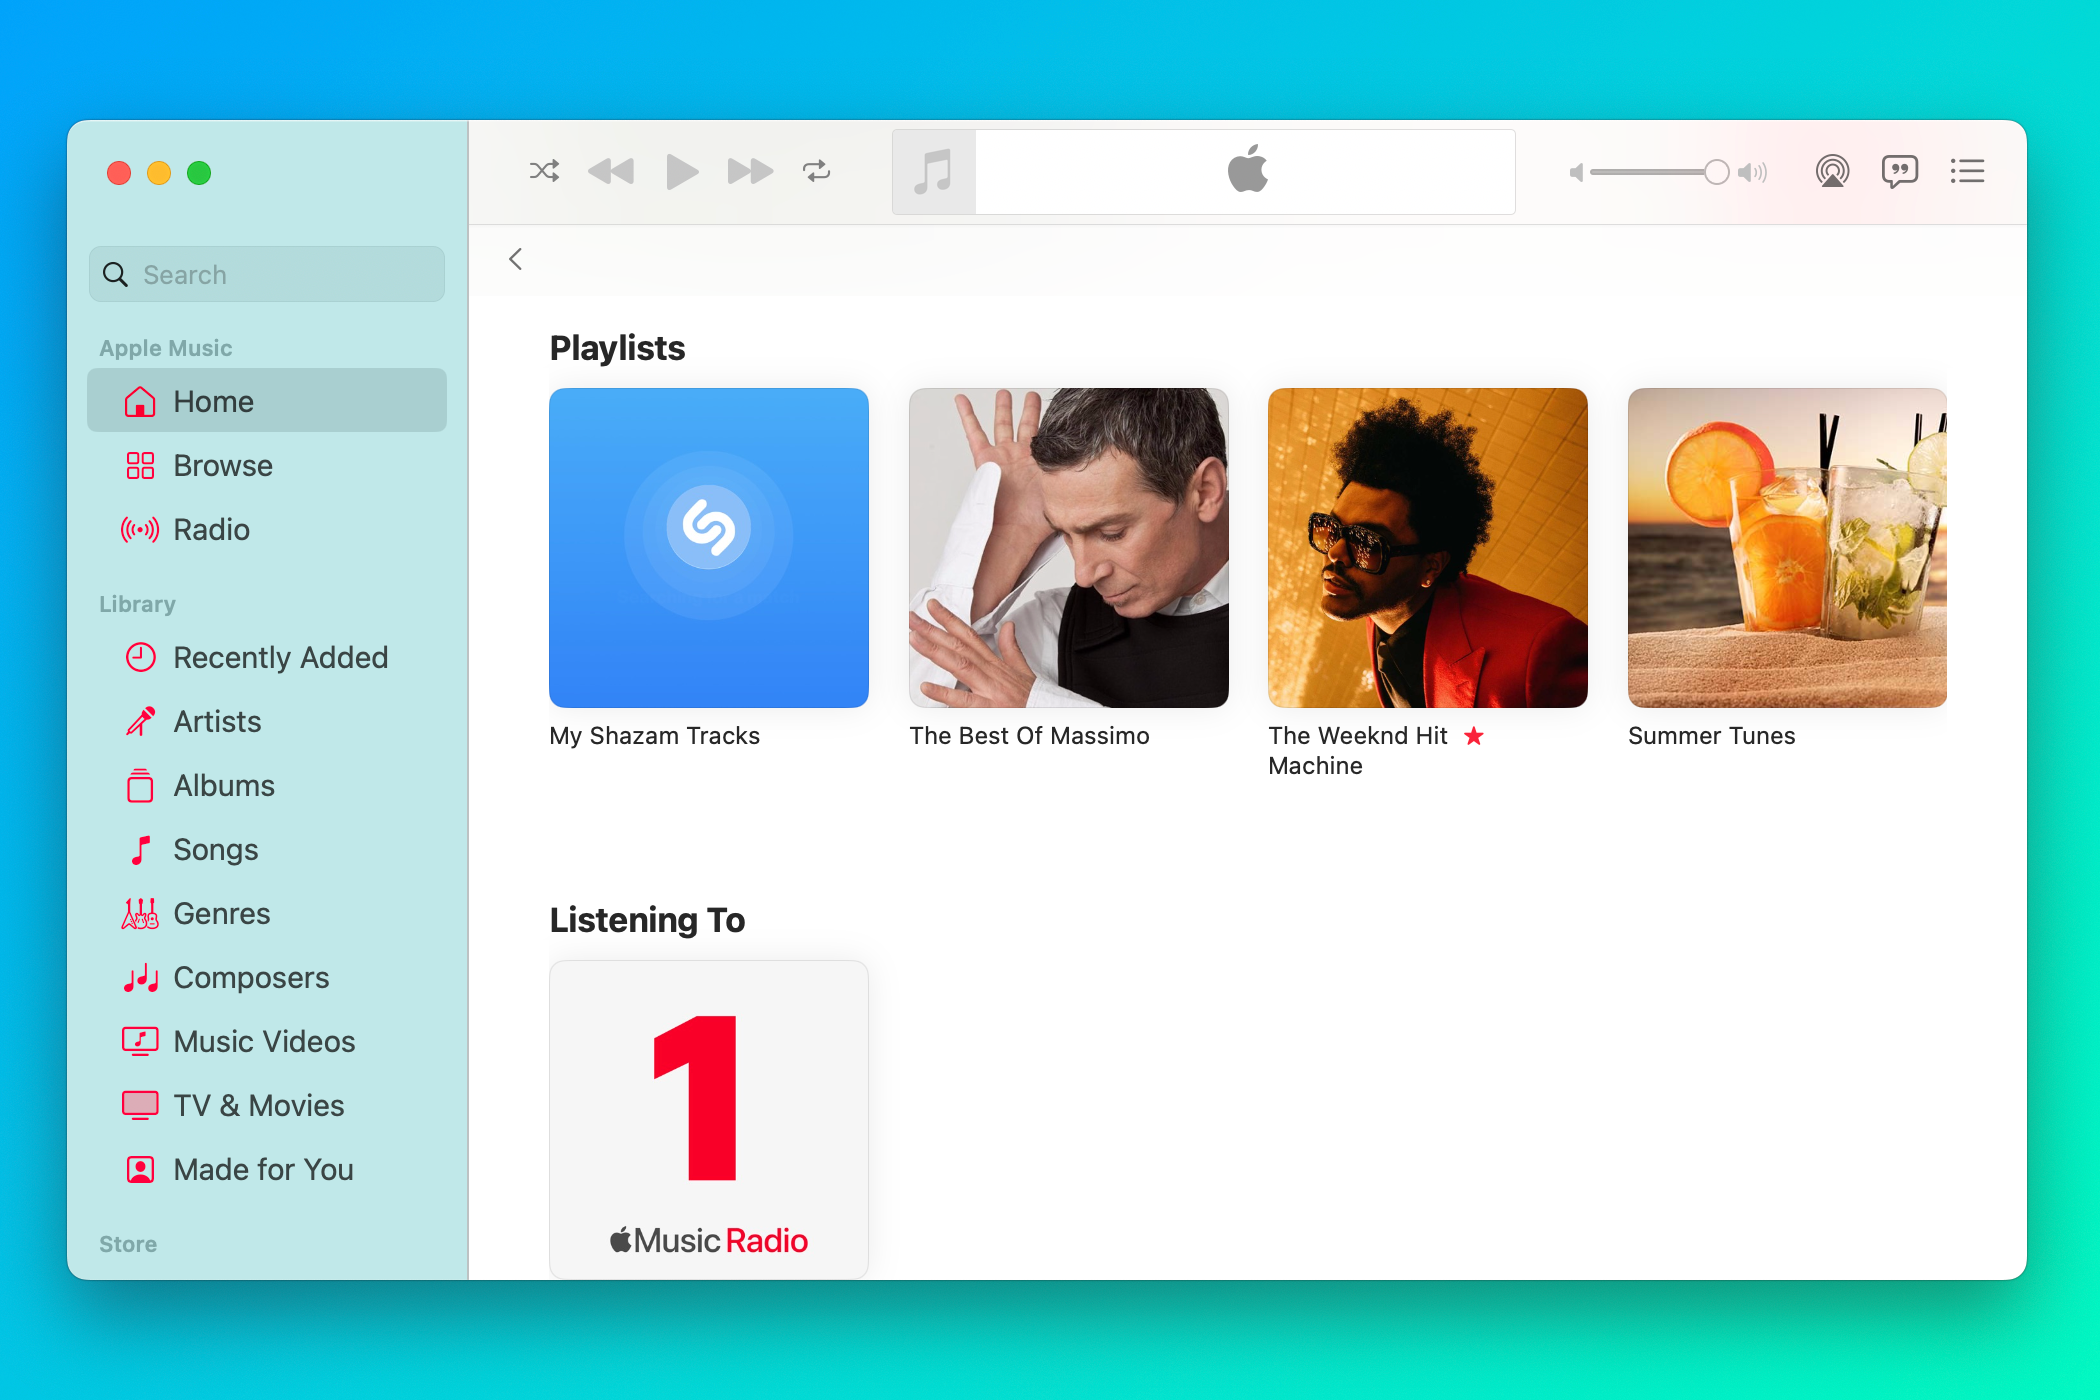
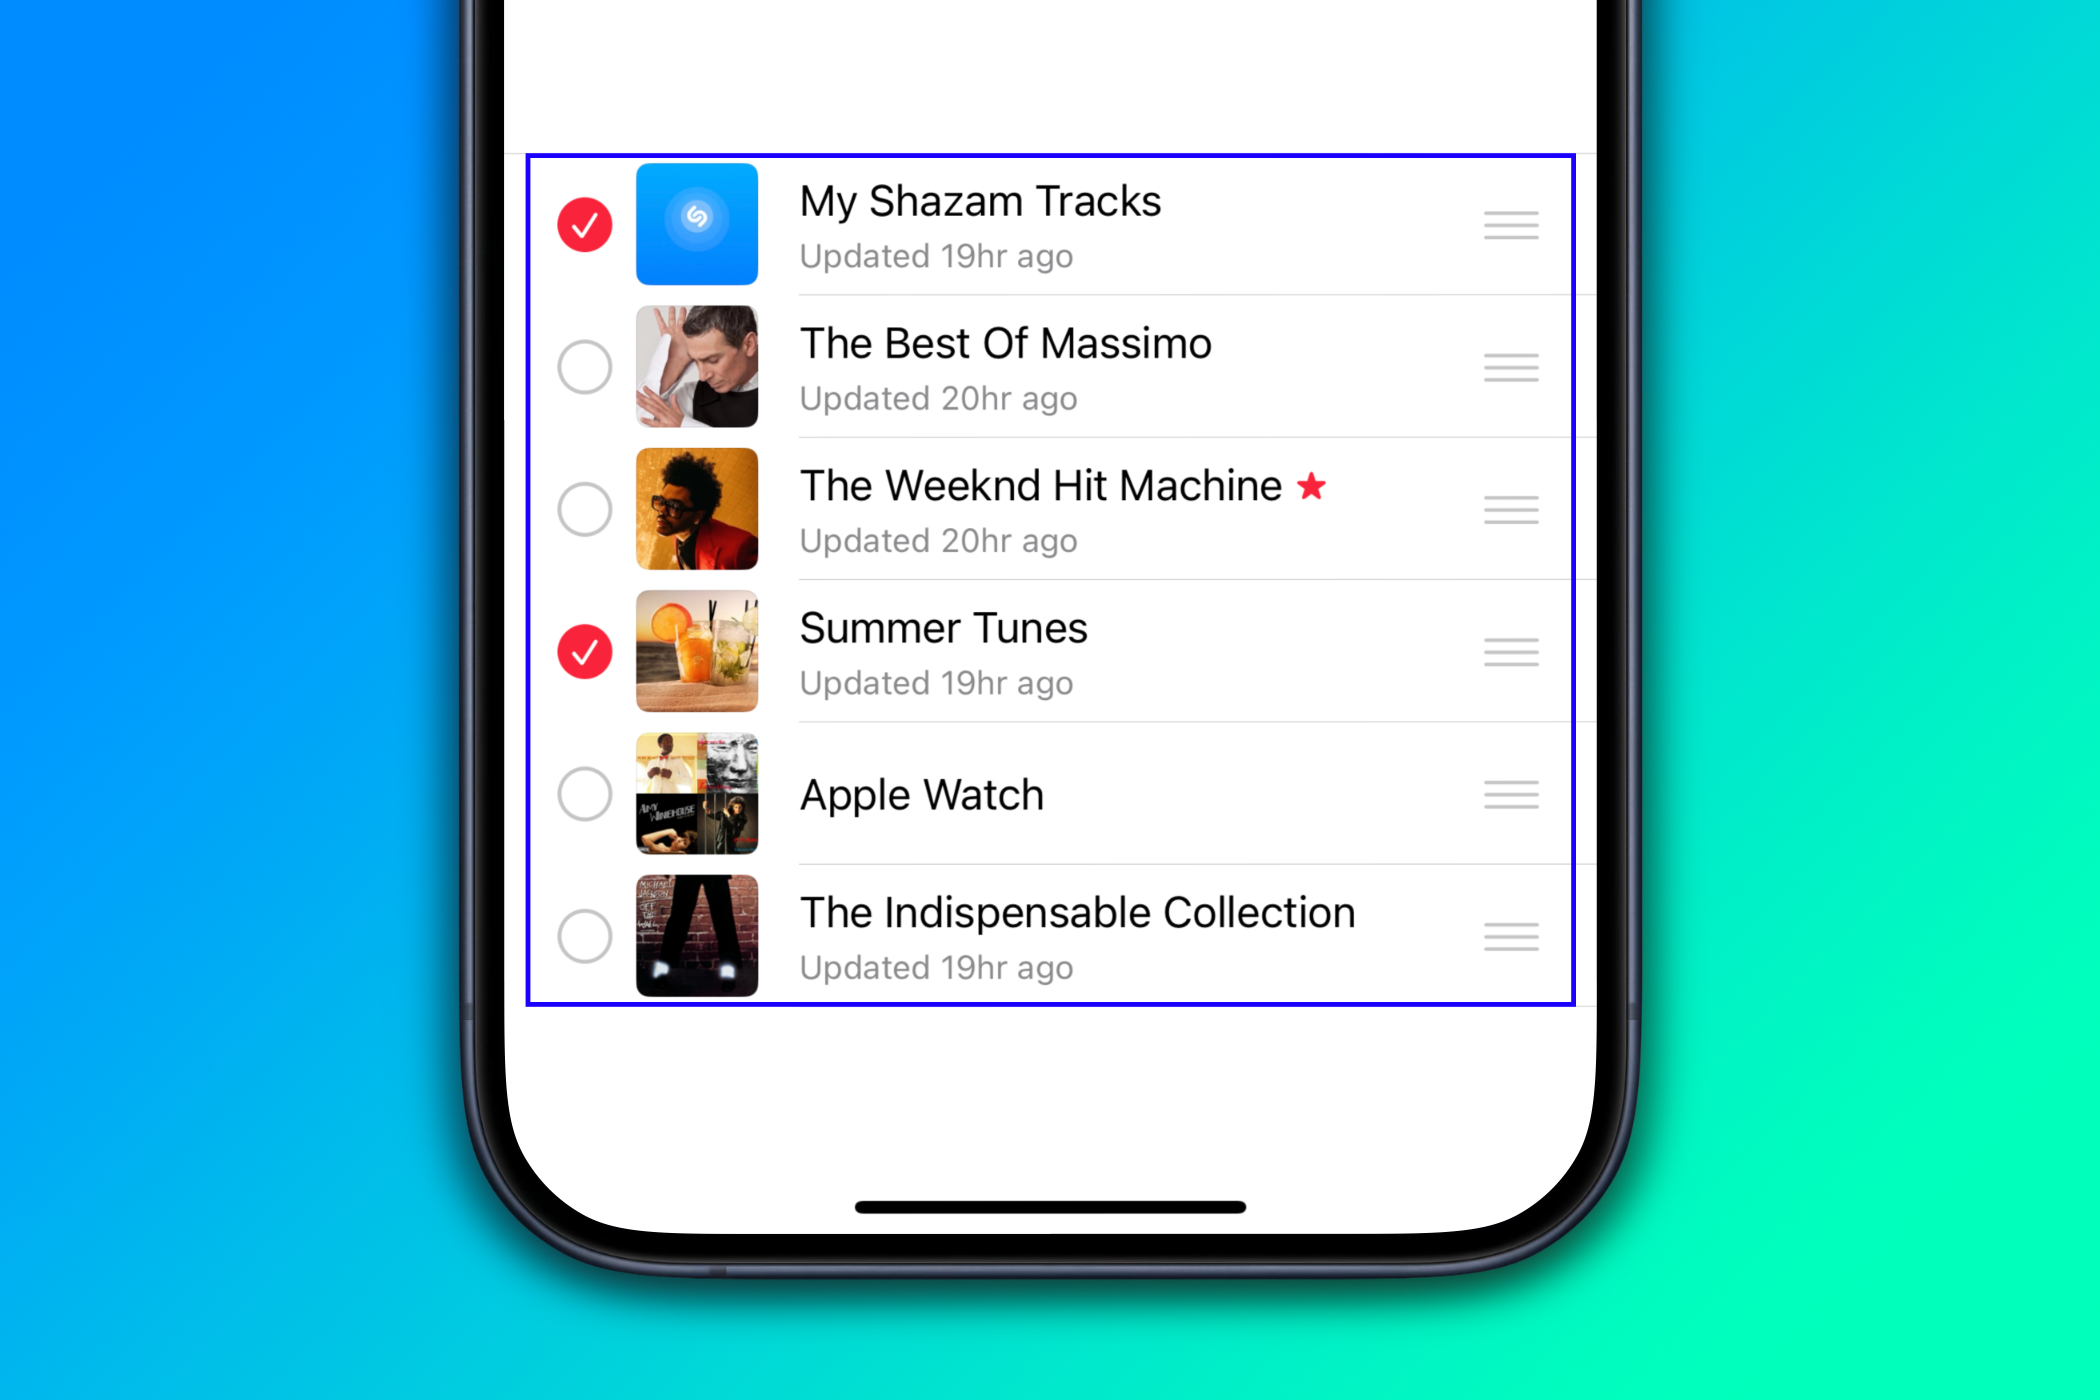
Open your profile in the Music app on an iPhone, iPad, or Mac and hit “Edit.” Now uncheck any playlists below “Shared Playlists” that you don’t want followers to see and click “Done.”
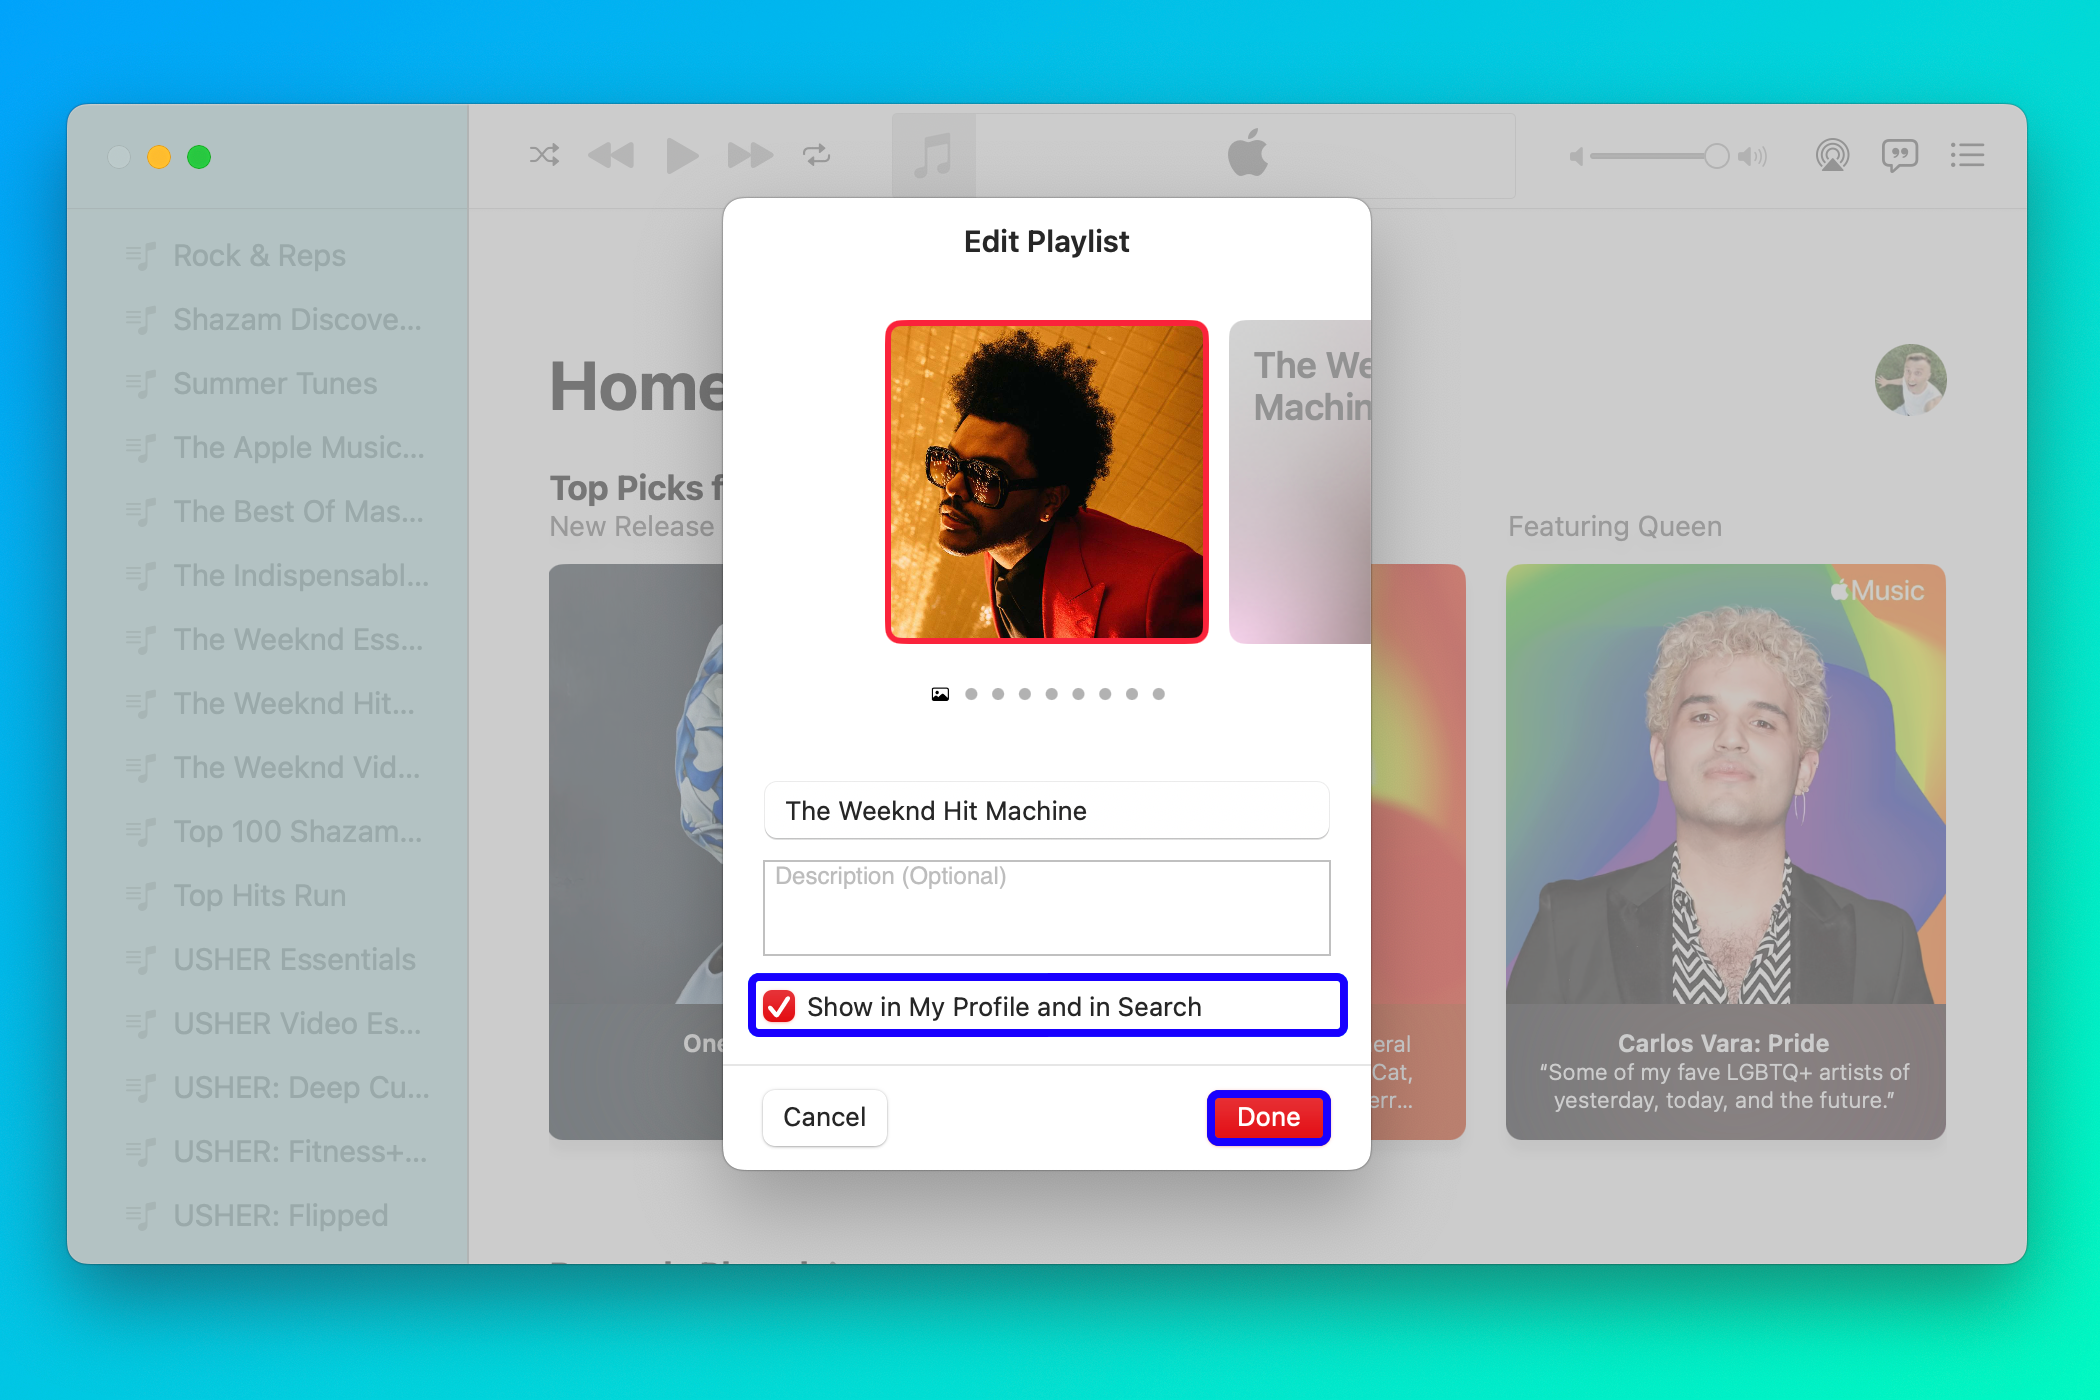
If you use a Mac, select any standard playlist in the sidebar, choose “Edit” from the contextual menu, and toggle “Show on My Profile and in Search” off.
You can only share the playlists you’ve manually created. Apple Music playlists and smart playlists cannot be shared with others.
How to Stop Showing Listening Activity on Your Profile
Songs, albums, and radio stations you listen to appear on your profile, but hiding music from your followers will help make your listening sessions more private.
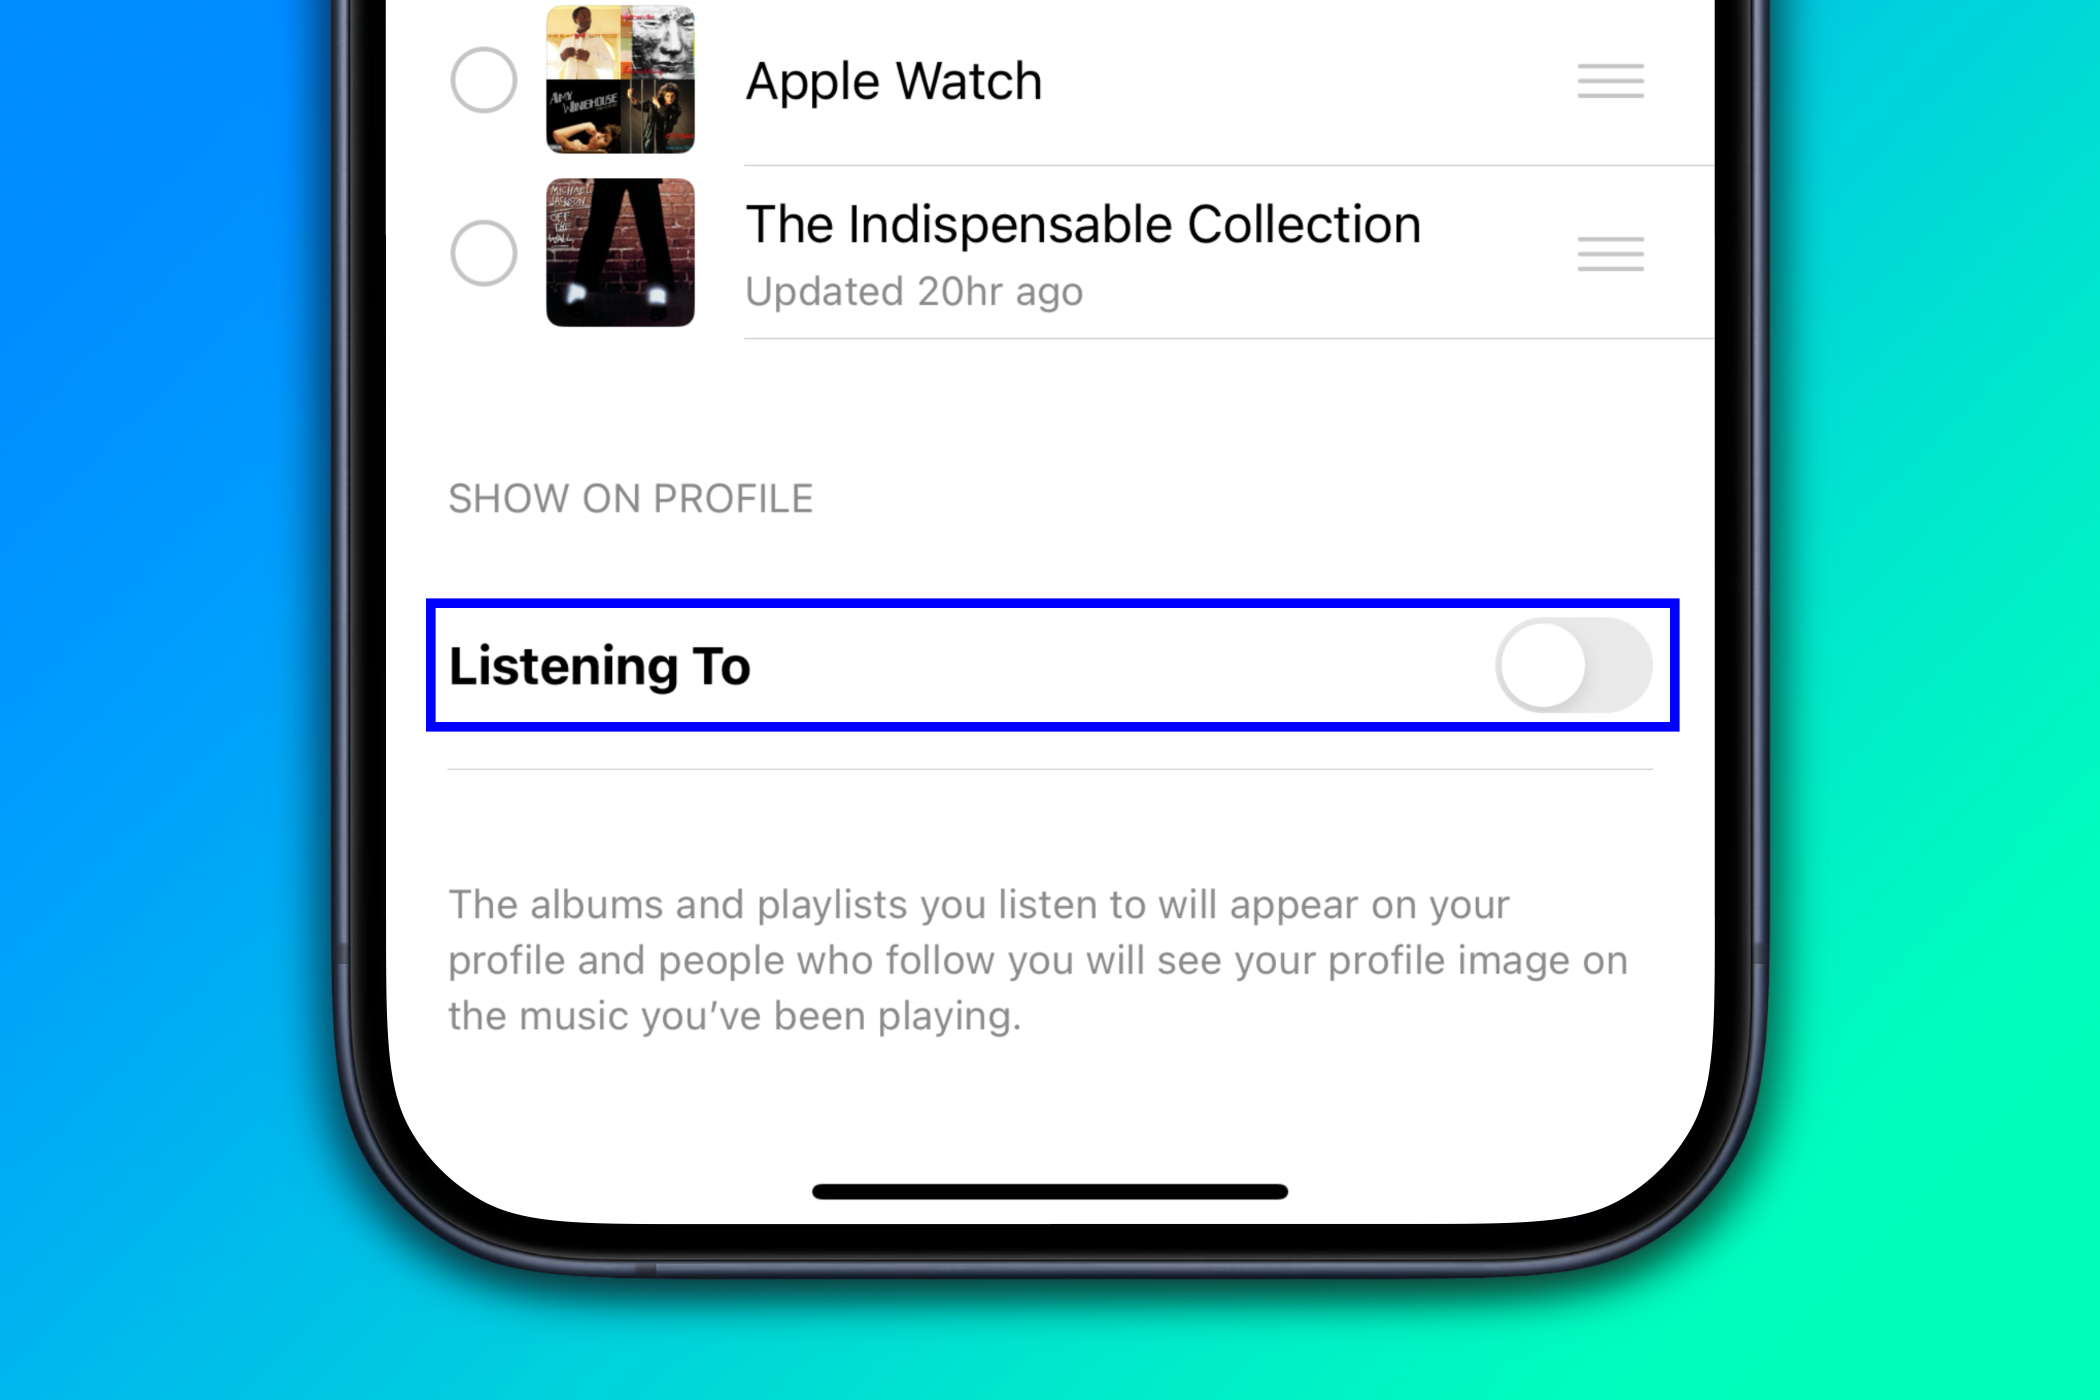
On an iPhone or iPad, open your profile in the Music app and hit “Edit.” Scroll down and turn off “Listening To” in the “Show on Profile” section, then hit “Done” to save changes.
On a Mac, choose “Additional Privacy Settings” below “Choose Who Can Follow Your Activity” on your profile.
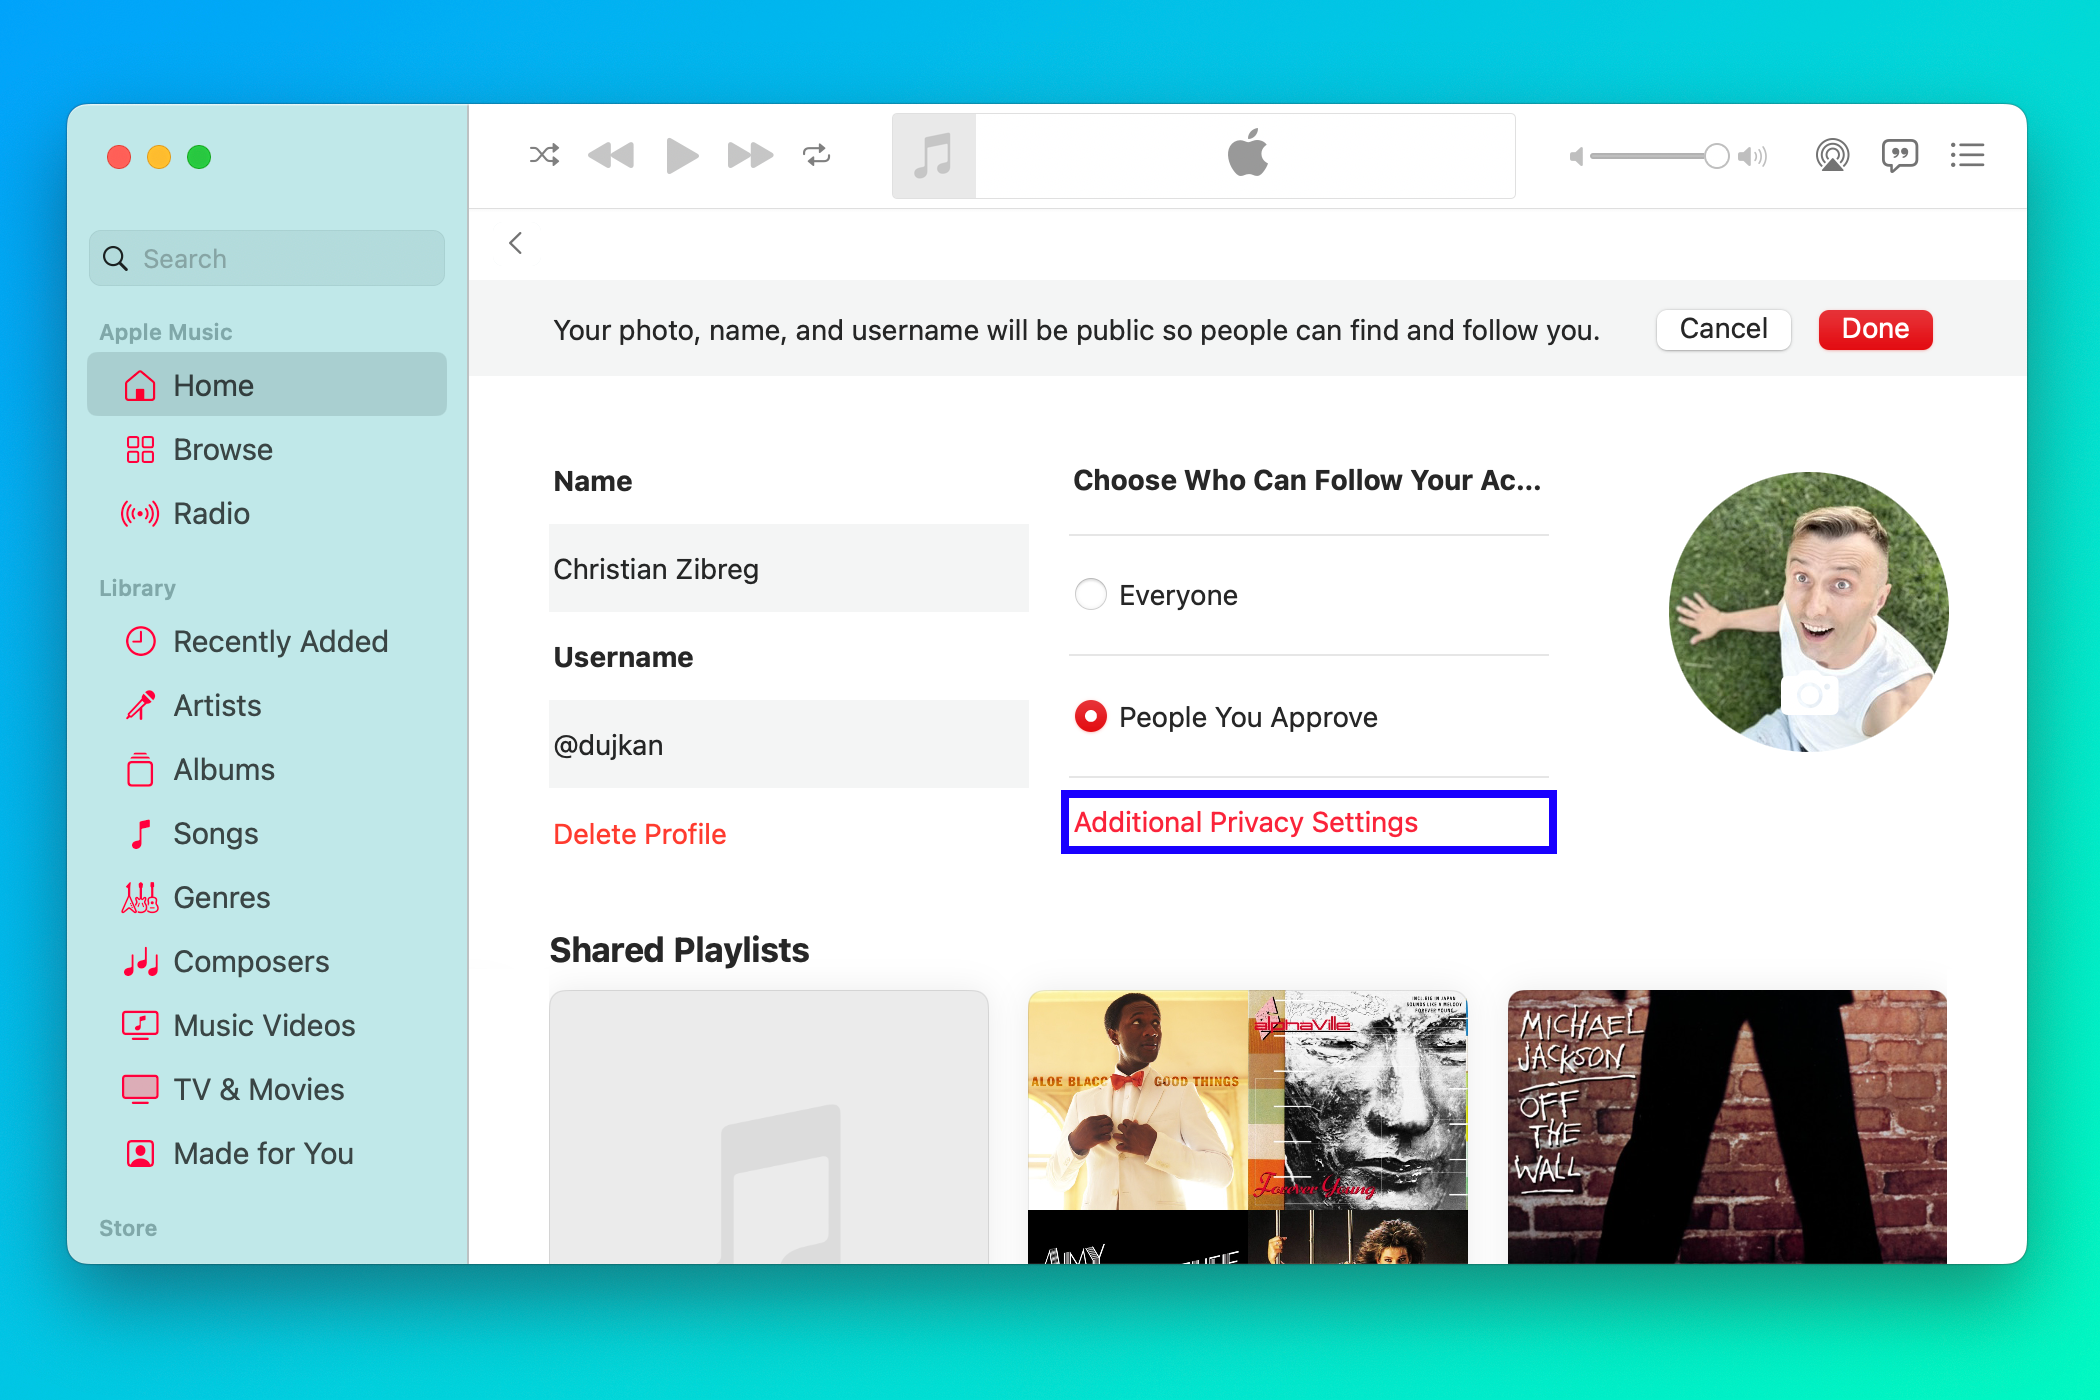
Restricting your activity to approved followers and not sharing your listening history makes your Apple Music profile less engaging for followers, which somewhat defeats the purpose.
How to Delete Your Apple Music Profile
I created my Apple Music profile back when Apple launched the feature. I completely forgot about it, so it’s been dormant. If you’re in the same boat, you might want to rethink whether or not you actually need a profile on Apple Music. Maybe you haven’t been using it much or don’t want to be judged by followers for sharing your musical tastes.
To delete your Apple Music profile, hit “Edit” on your profile in the Music app on iOS, iPadOS, and macOS, scroll down, choose “Delete Profile,” then click “Delete Profile” again to confirm.
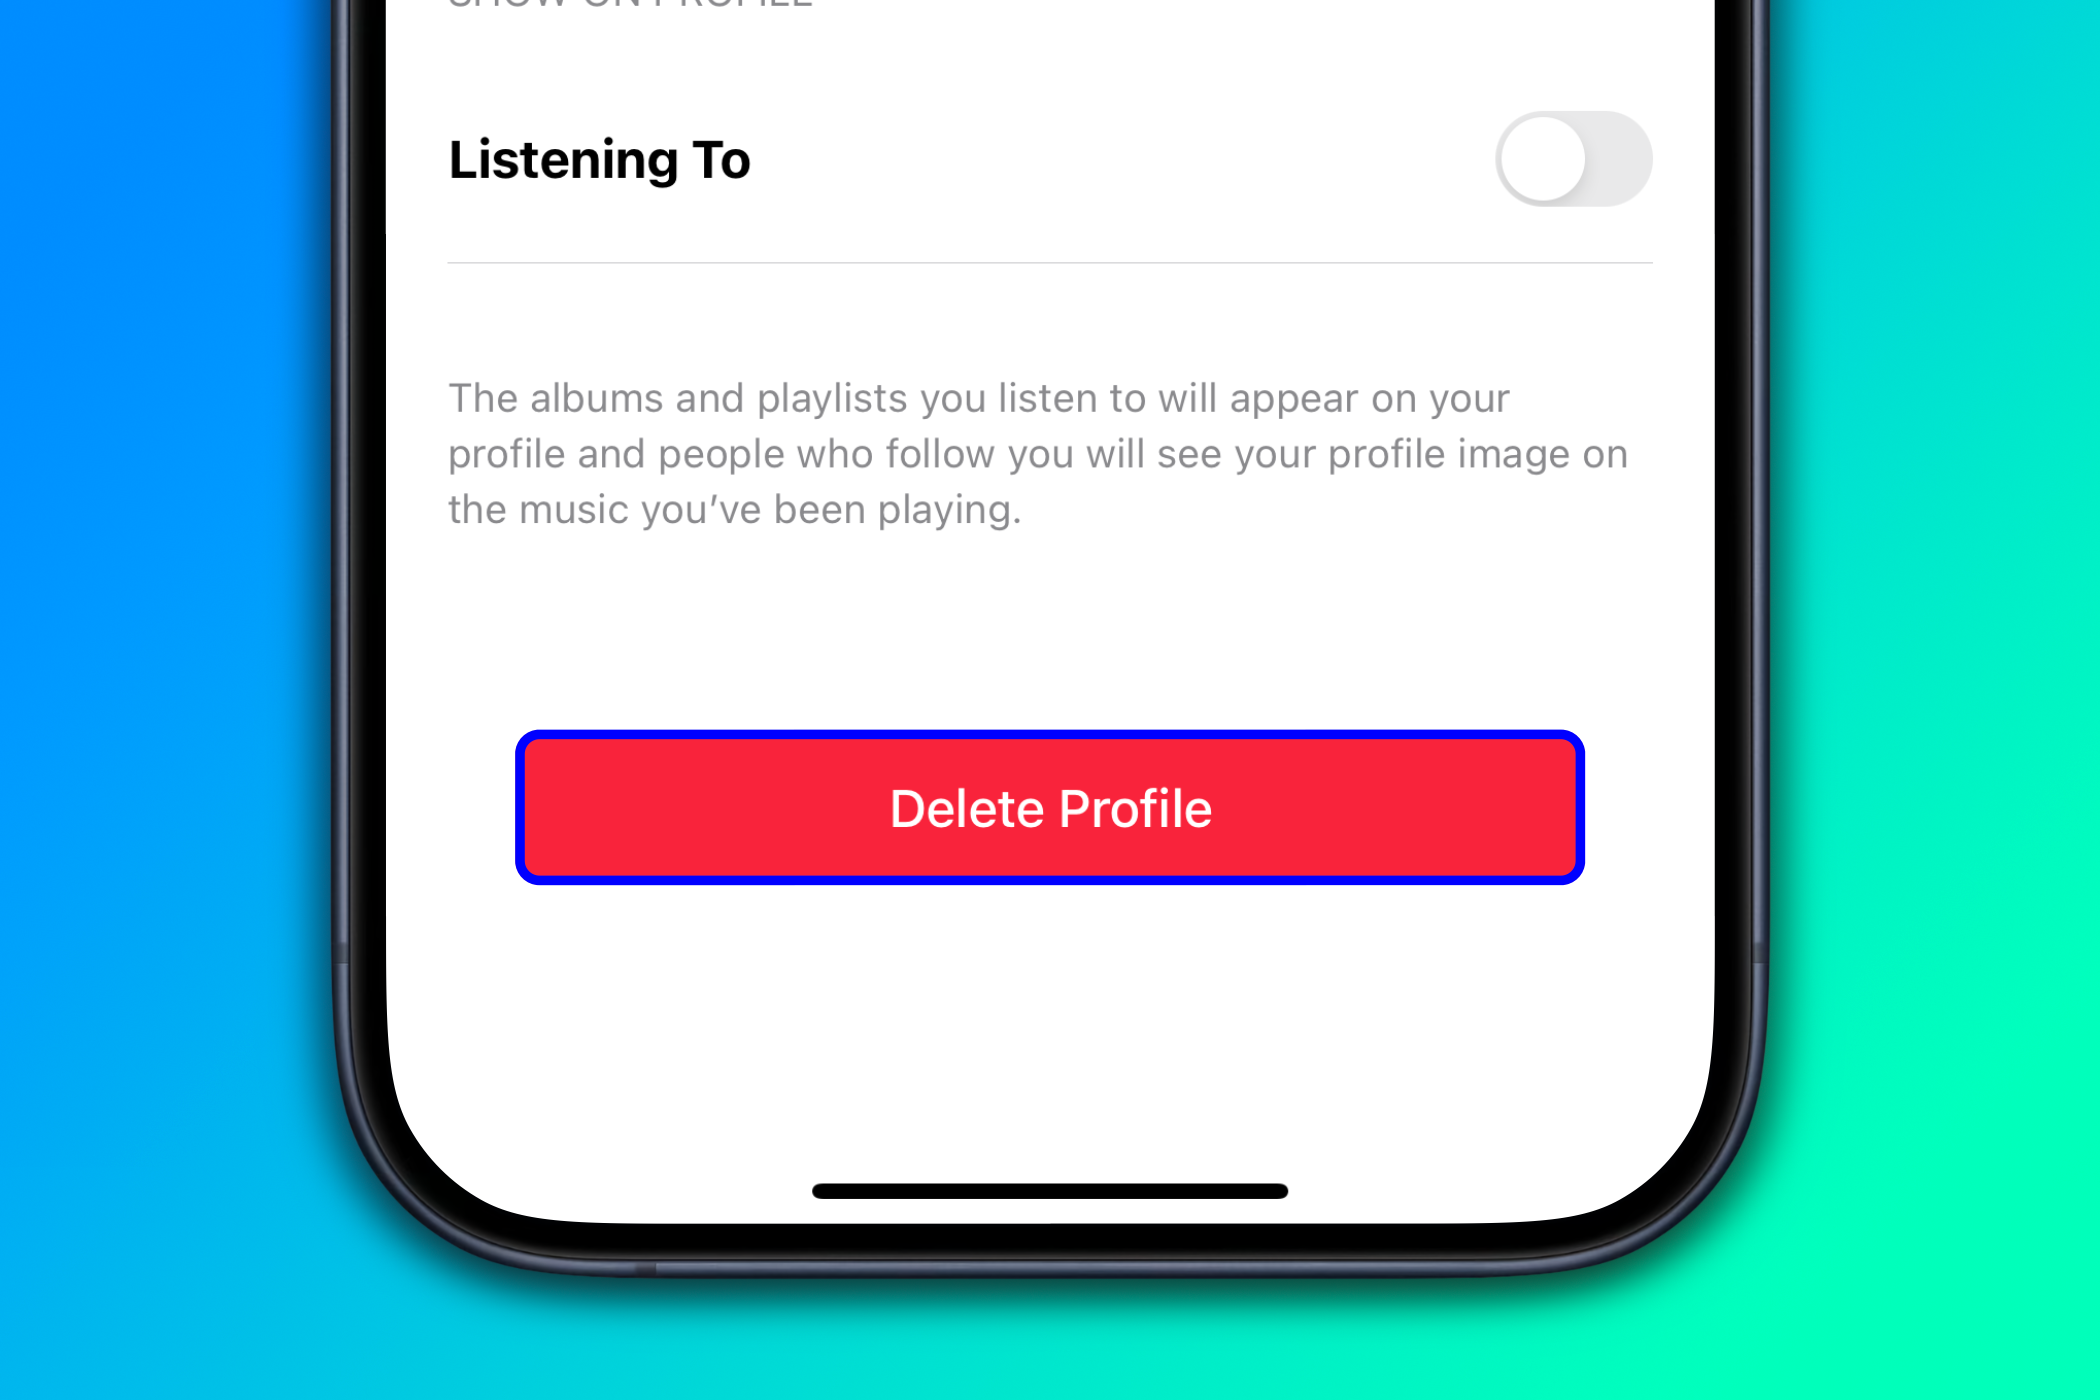
Your profile, along with any playlists shared through, will no longer appear in Apple Music search, meaning no one will be able to see what you listen to.
You have 90 days to change your mind and create a new profile with the previous information and followers restored.
Songs and more in your listening history are used for recommendations. They also appear in the Recently Played list and affect what ends up on your Apple Music Replay .
Temporarily turning off your listening history with the Focus Mode feature on an iPhone, iPad, or Mac is the best way to enjoy private listening moments on a whim.
Also read:
- [New] 2024 Approved SmoothRecorder Ultimate Edition
- [Updated] 2024 Approved Instagram's Most Reliable Grid Creation Tools, Countdown to Top Ten
- [Updated] Dynamic Backdrop Customization in Teammate Windows, Pre/Post Calls for 2024
- [Updated] Fix “Facebook Messenger Not Sending Videos” On iPhone and Android for 2024
- [Updated] Lightroom Workflow Creating & Merging Professional HDR Images
- Best Top 5 DVD Ripper Tools: Convert Your Movies From DVD to FLV on Windows and macOS
- Change Location on Yik Yak For your Realme 12 Pro+ 5G to Enjoy More Fun | Dr.fone
- Convert Your MP4 Files to VOB for Free - Tips and Tricks for Both Online and Offline Methods
- Diagnosing and Repairing Constant Elex II Disruptions During PC Gaming
- Effortless AVCHD to MP4 Transformation Techniques for Optimizing Kindle Fire Viewing Experience
- Effortless Conversion Techniques From AVI to WMA Without Compromising Quality
- Essential Guidelines for Choosing the Right Podcast Name for 2024
- Mastering iPod Video Compatibility: Essential Info for Optimal Viewing Experience
- MOD to iPad 2 Format: Ultimate IPAD 2 Video Converter Guide
- Seamlessly Adapt AVI Videos for Your iPad 2 with Our Expert Video Conversion Tool
- Spoofing Life360 How to Do it on Vivo Y78t? | Dr.fone
- The Ultimate Guide to Top Free Video-to-GIF Conversion Software (11 Picks)
- Title: Listen Securely: Four Essential Tricks to Maintain Anonymity with Apple Music
- Author: Kenneth
- Created at : 2024-09-22 18:31:38
- Updated at : 2024-09-26 05:25:57
- Link: https://media-tips.techidaily.com/listen-securely-four-essential-tricks-to-maintain-anonymity-with-apple-music/
- License: This work is licensed under CC BY-NC-SA 4.0.